How to add a form to your Webflow site
Connect a Webflow form to FormBackend so submissions land in your inbox and dashboard — no submission limits. Works on both hosted and exported Webflow sites.
Webflow is a powerful drag-and-drop editor for building responsive websites.
Exported Webflow sites can’t use Webflow’s built-in form handling, and hosted sites limit how many submissions you can collect. In this guide we’ll connect a Webflow form to FormBackend so you can receive submissions — with no limits — on either a hosted or an exported Webflow site.
Add a form to FormBackend
Log in to your FormBackend account and visit the forms index page. Go ahead and create a new form and give it a name you can remember it by. A form is basically just a blank slate for the form you add to your website. You can add as many fields as you’d like to the form on your website and the data that is submitted will show up for the form on FormBackend.
After your form has been created, you’ll see the “Submissions” page which is where new submissions will appear. If you navigate to the “Set up” page you can see the unique URL for your form. We’ll copy that!
Add a new form to Webflow
Go to the page you want to add a form to in Webflow and add a new “Form Block”

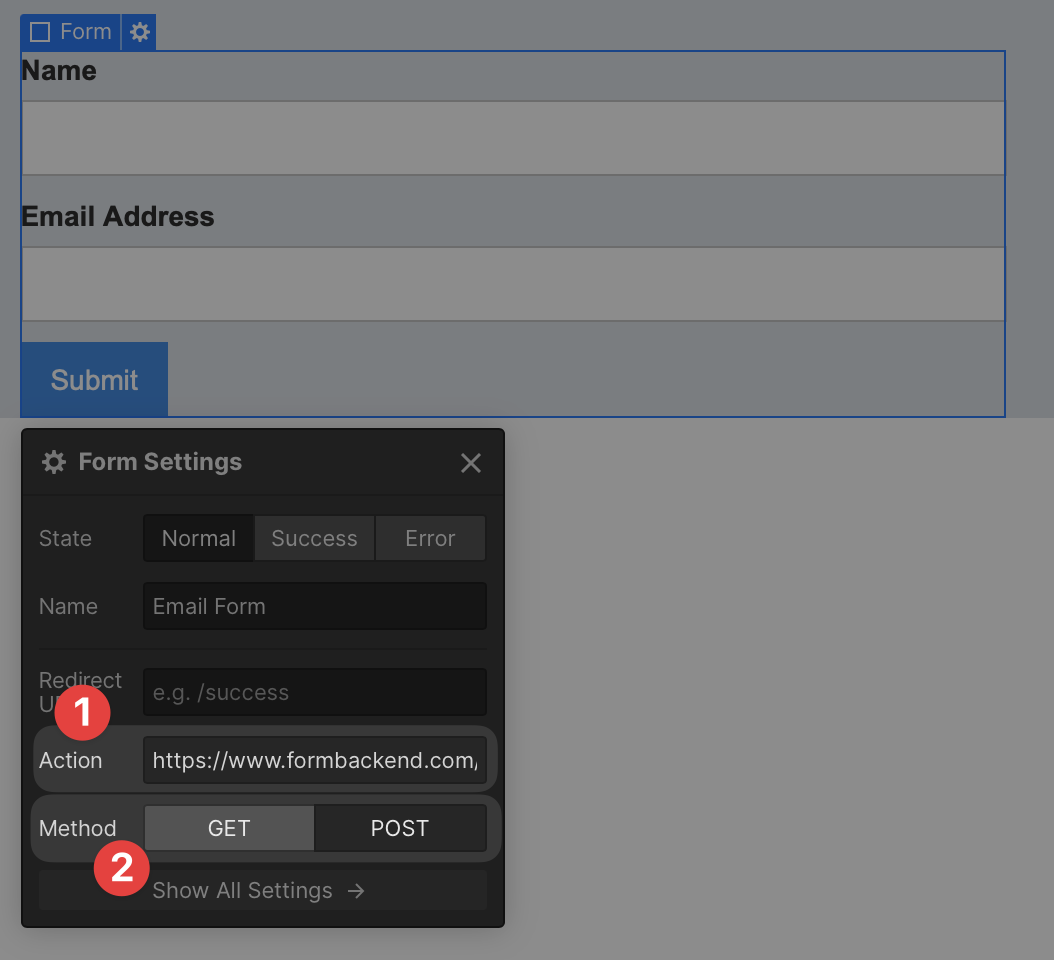
Select the newly added “Form Block” in the Webflow editor and add your unique FormBackend form url (the https://www.formbackend.com/f/{your-identifier} url you copied when creating your form) to the Action field and set the Method to “POST”
Now when you submit the form on your webflow site, the submission will show up in FormBackend.
Tips for Webflow forms
Every form field you add in Webflow’s designer gets a name attribute, which is how FormBackend identifies each field. Make sure each field has a unique, descriptive name (e.g. “name”, “email”, “company”). You can set this in the field settings panel in Webflow.
If you want to accept file uploads through your Webflow form, you can add a file input field and set the form’s encoding to multipart/form-data in the custom attributes.
Set up notifications and integrations
Now that your Webflow form is sending submissions to FormBackend, here’s what to configure:
- Email notifications: Get notified by email every time someone submits, with optional file attachments
- Auto-reply emails: Automatically send a confirmation to the person who submitted your form
- Spam filtering: Every submission is checked for spam automatically. Add Cloudflare Turnstile or hCaptcha for extra protection
- Integrations: Forward submissions to Slack, Google Sheets, Notion, Discord, or any URL via webhooks
- Custom redirect: Send users to a specific page on your Webflow site after they submit
- Customize the thank-you page: Change the default success message users see
Looking for a code-based approach? See our guides for React, Next.js, HTML, WordPress, and more.
Add a form backend to your site in minutes
Connect any HTML form to FormBackend and start collecting submissions — no backend code required.
Start free