Stay on top of your submissions and send them to your Discord server
Learn how to send form submissions to your Discord server using webhooks. Get instant notifications in any channel when someone fills out your form.

If you don’t want to miss a submission and want to make sure that your team sees them, sending them to Discord can be a good idea. Every time someone fills out your form, a message appears in the Discord channel of your choice with the submitted data.
This works great for support forms, contact forms, feedback forms, or any form where you want real-time visibility across your team.
What you need
- A FormBackend account with at least one form
- A Discord server where you have permission to manage webhooks
Create a new webhook in Discord
Right click on your server and click on Server Settings > Integrations.
Click on “New Webhook” to create a new Discord webhook. Give it a name (this will be the name you’ll see in Discord when a new submission comes in) and pick a channel you want the submission to be sent to. You can change the avatar photo as well if you want.
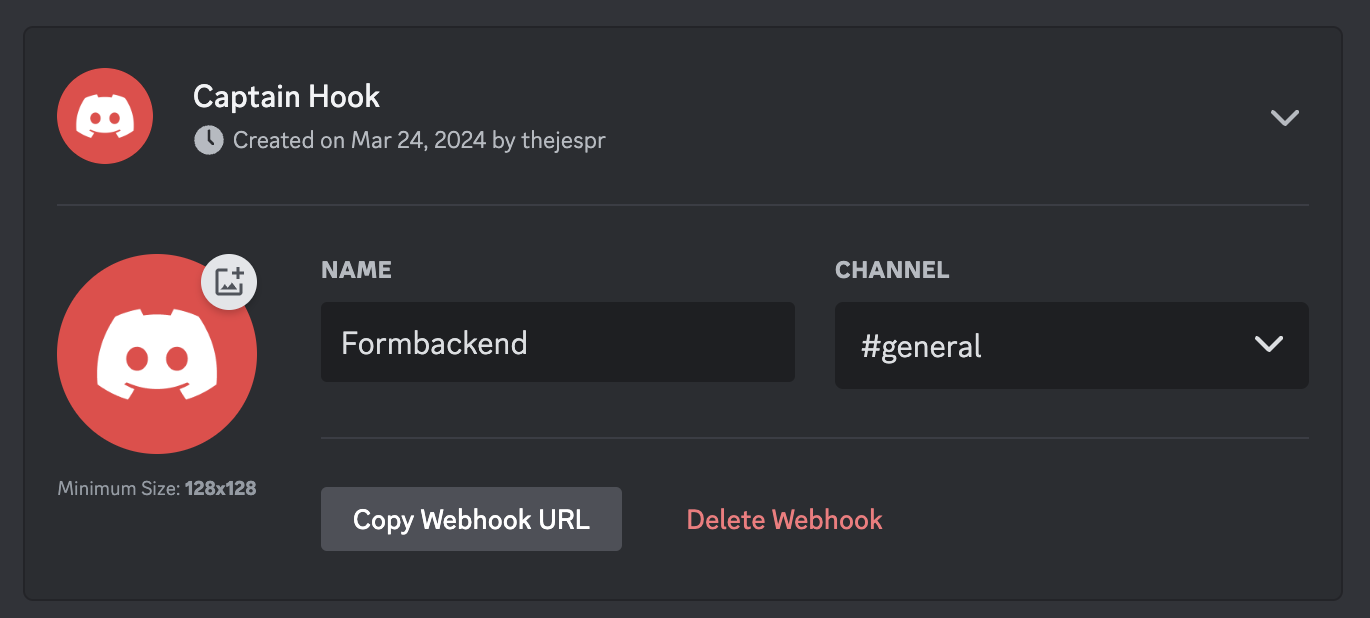
Copy the webhook URL by clicking on the “Copy Webhook URL” button. Keep this URL handy as you’ll need it in the next step.
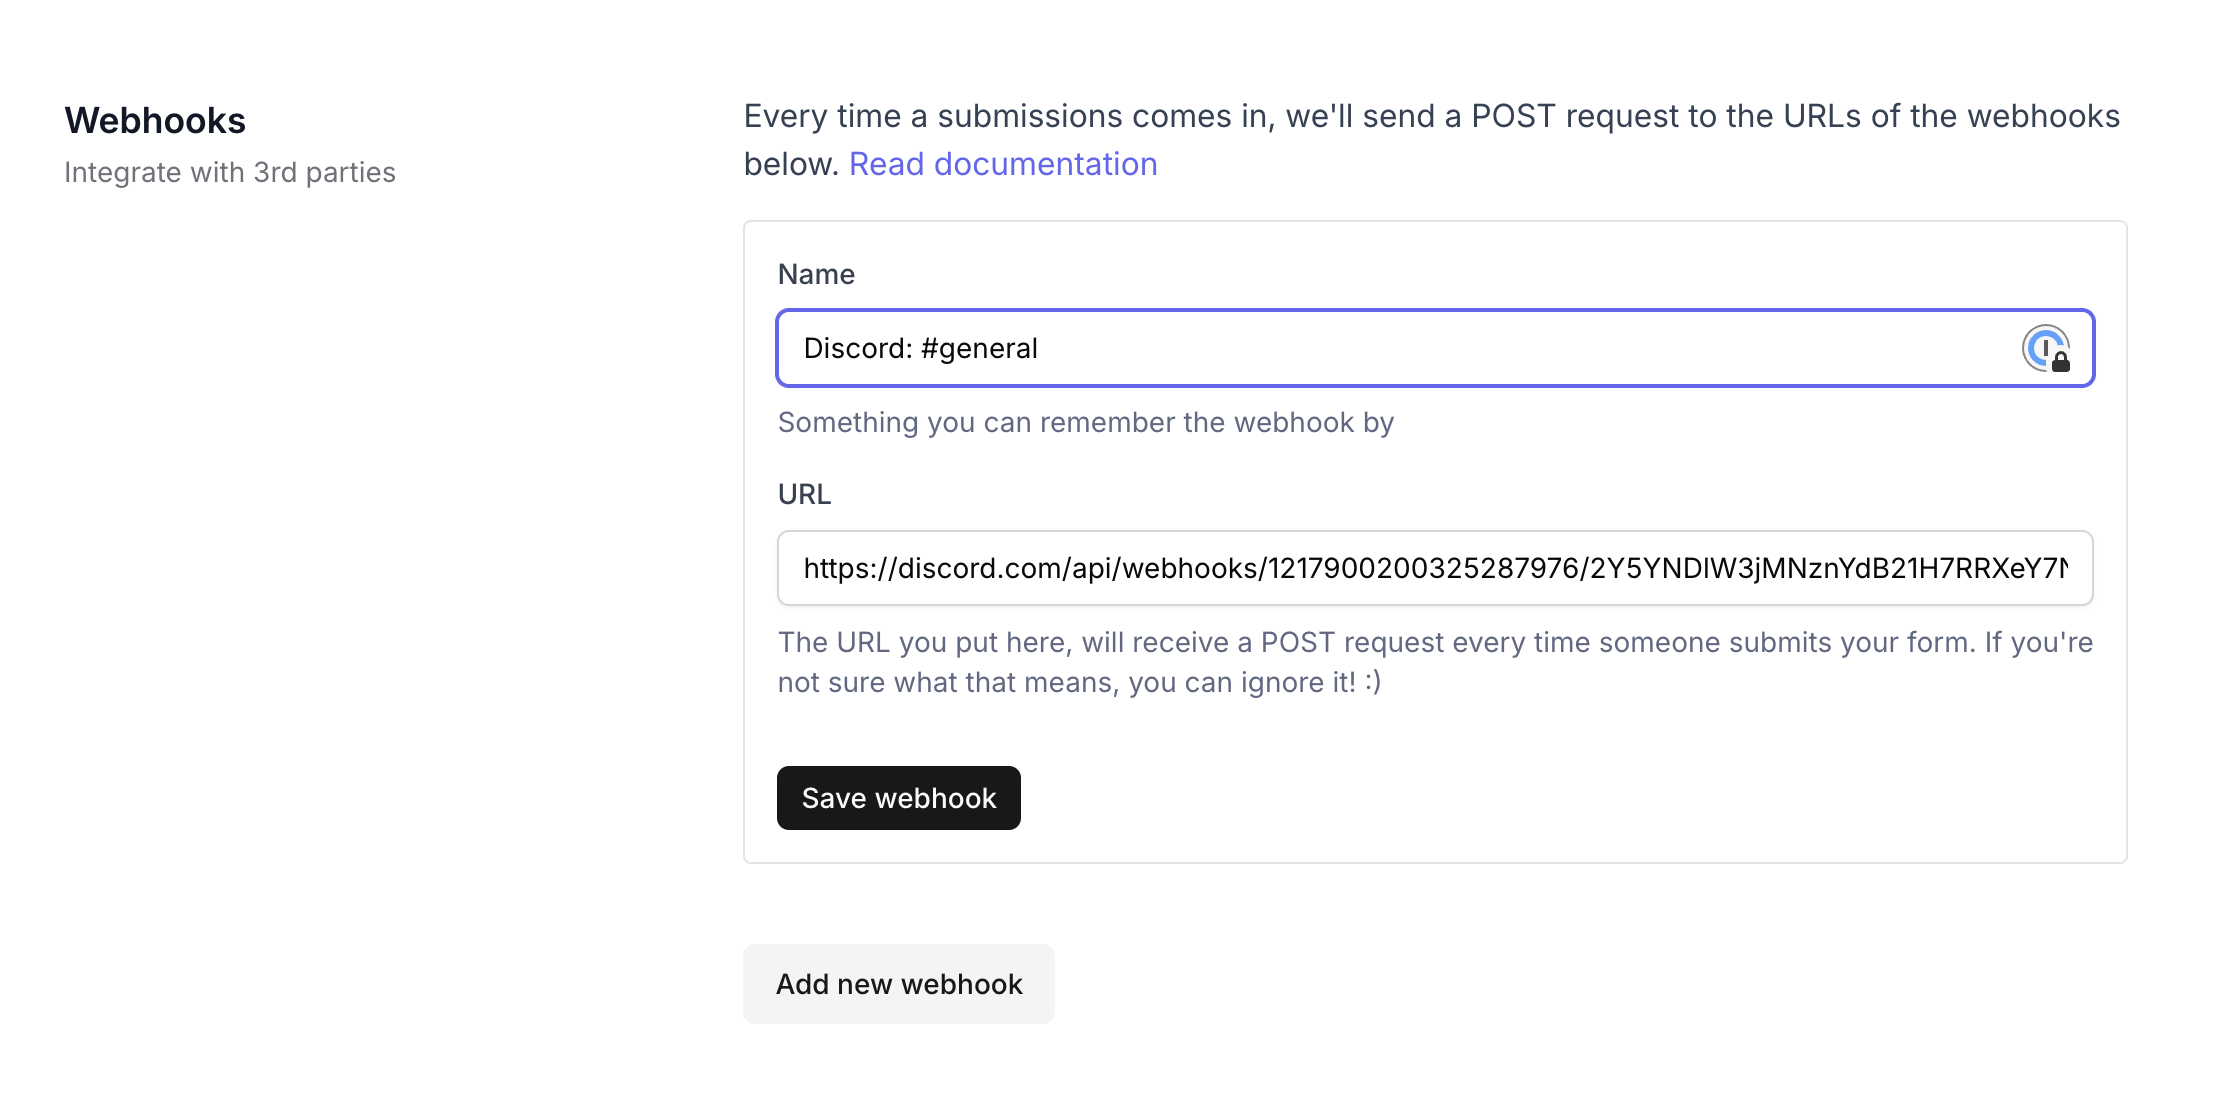
Add a webhook to your form in FormBackend
Go to your form in FormBackend and navigate to the Integrations tab. Scroll to the Webhooks section and click “Add new webhook”.
Give it a descriptive name like “Discord - Support Channel” and paste in the URL you copied from Discord into the URL field. Click “Save webhook” and you should now see submissions show up in Discord as they’re submitted.
Test it out
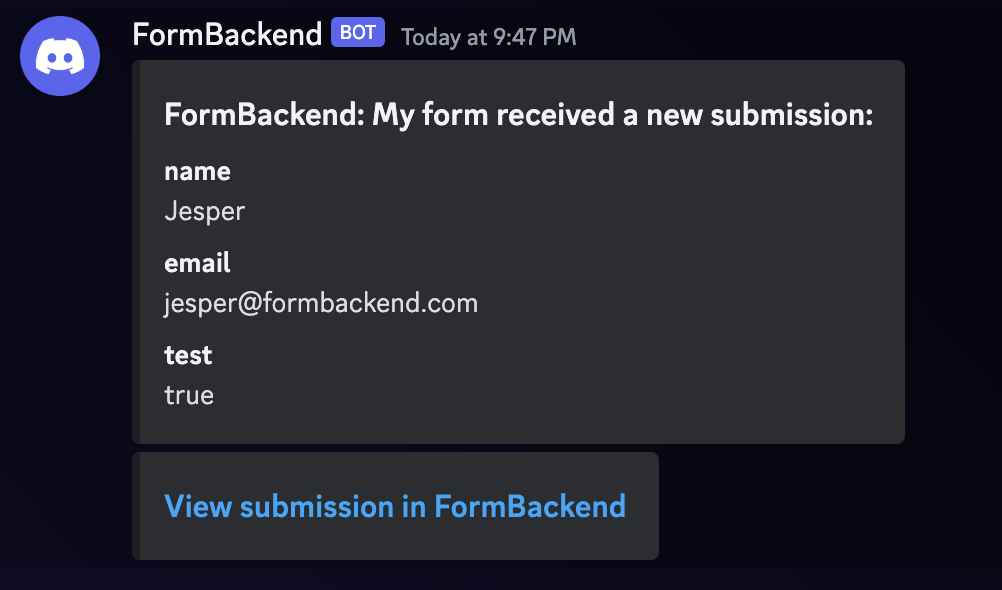
You can try it by going to the “Set Up” tab for your form and submitting a test entry. Here’s an example of what a submission looks like in Discord:
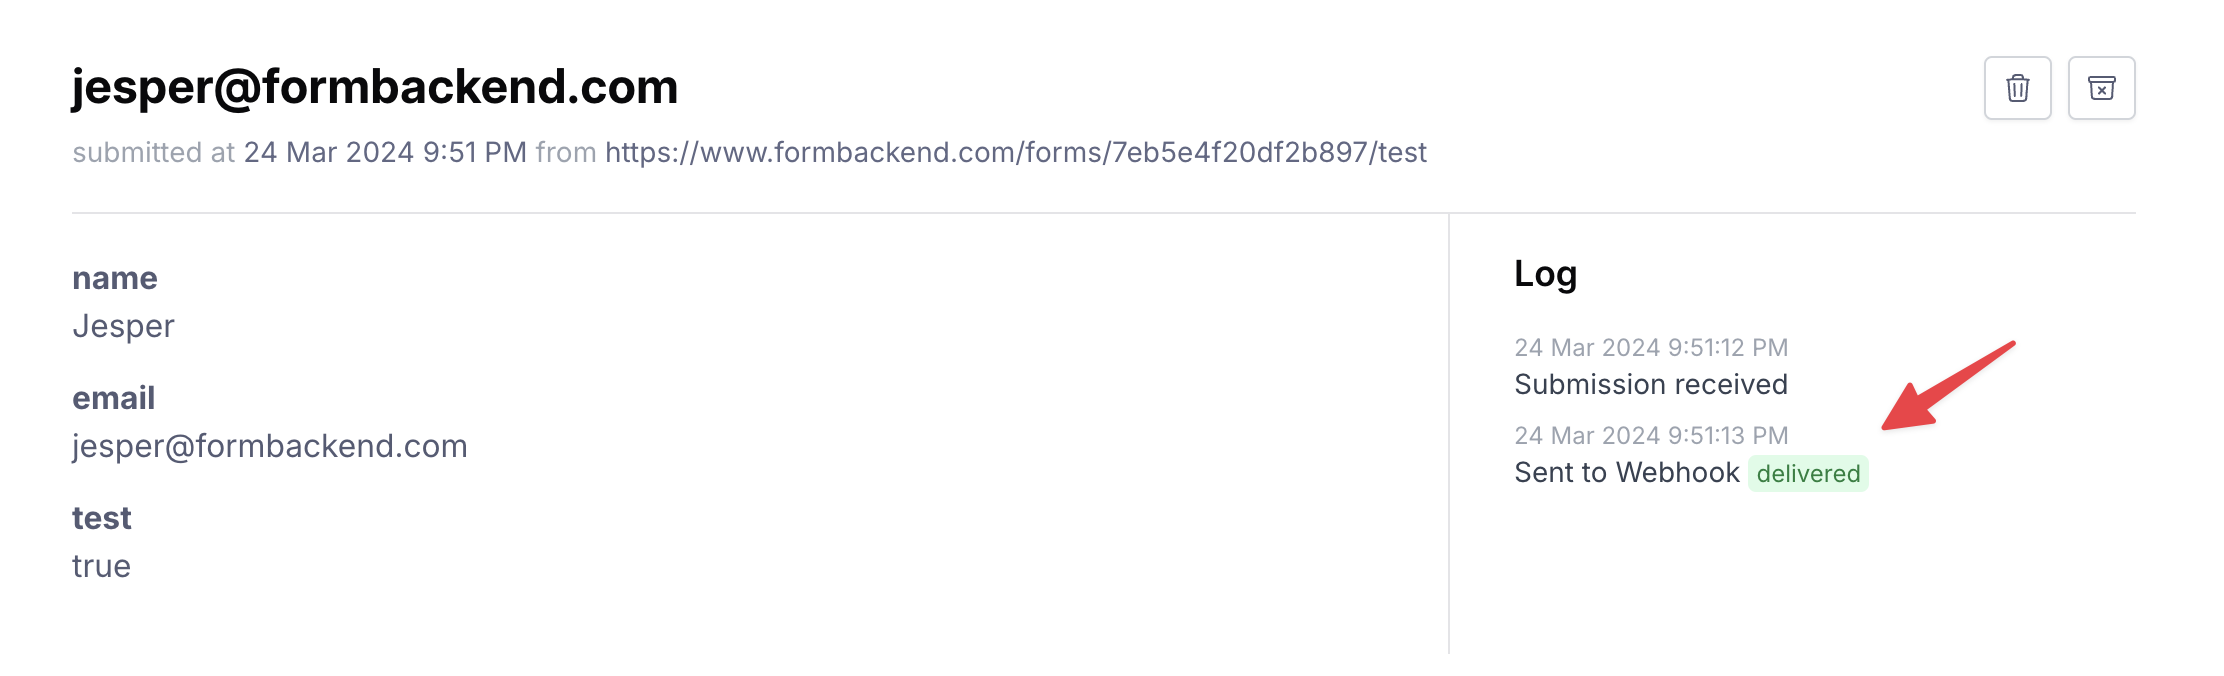
If you navigate to the submission in FormBackend you can see in the event log that it was sent to Discord as well (the webhook entry).
Why Discord over email?
Email notifications are useful for a single person, but they can get buried in a busy inbox. Discord gives you several advantages:
- Team visibility - everyone in the channel sees the submission immediately
- Threaded discussion - your team can discuss a submission right in the channel
- Mobile notifications - Discord push notifications are faster than email for many people
- Organization - route different forms to different channels (e.g., support requests to #support, sales inquiries to #leads)
You can use both
Sending submissions to Discord doesn’t replace other notification methods. You can use Discord alongside email notifications, Slack, Google Sheets, and any other webhooks at the same time. Every submission gets sent to all configured destinations.
For a full list of integrations, see the integrations page.
Next steps
- Set up spam filtering so only real submissions reach your Discord
- Add a custom thank-you page for users after they submit
- Check out the Discord integration docs for more details
- Explore other integrations like Slack, Notion, and Airtable
Keep reading
The HTML Form Action Attribute: A Complete Guide
What the HTML form action attribute does, what to put in it when you have no server, how formaction works, and a checklist for when your form action won't submit.
Backend as a Service Examples: Real-World BaaS Use Cases
Discover real-world backend as a service examples, from forms to databases. Learn how to choose the best BaaS for your project with practical comparisons.
HTML Form Spam Protection: A Practical Guide for 2026
Learn practical, layered HTML form spam protection. This guide covers client-side honeypots, server-side validation, CAPTCHA, and how to stop spam for good.
Add a form backend to your site in minutes
Connect any HTML form to FormBackend and start collecting submissions — no backend code required.
Start free