NuxtJS is a very popular framework to create Vue.js applications. It comes with some great out-of-the-box choices already made for you so you can be as productive as possible when building your application.
In this guide we aim to show you how to add a contact form to your NuxtJS website and send emails when a new submissions is received.
We’ll start from scratch and assume you don’t have an existing NuxtJS site. If you do have a site already, you can proceed to the next section. It might be a good idea to have the NuxtJS documentation handy as well in case you have further questions.
Let’s start out by creating a new NuxtJS application using create-nuxt-app. Make
sure you have installed yarn and npx (included with npm v5.2+).
In your terminal, run the following
yarn create nuxt-app my-project
The installer will ask you a series of questions. What you pick here is completely up to you and doesn’t really impact how we’re going to add the form - so pick what you like :)
After everything has completed go ahead and run yarn dev to spin up your development server. If you visit the URL it shows you in the terminal (http://localhost:64454)
you should see this:
Perfect! 🎉 Next thing we’ll do is adding a contact form to the page.
Log in to your FormBackend account and visit the forms index page. Go ahead and create a new form and give it a name you can remember it by.
After your form has been created, you’ll see the “Submissions” page which is where new submissions will appear. If you navigate to the “Set up” page you can see the unique URL for your form. We’ll copy that!
Now that we have the form endpoint in FormBackend, we can add the form to NuxtJS. To do this we’re going to create a new file called contact.vue in the /pages directory in the NuxtJS app you just created.
We’ll add the following code to it:
<template>
  <div>
    <h1>Contact us</h1>
    <p>Send us a message!</p>

    <form accept-charset="UTF-8" action="https://www.formbackend.com/f/{your-identifier}" method="POST">
      <div class="fieldset">
        <label for="name">Name</label>
        <input type="text" id="name" name="name" required>
      </div>

      <div class="fieldset">
        <label for="email">Email</label>
        <input type="email" id="email" name="email" required>
      </div>

      <div class="fieldset">
        <label for="message">Message</label>
        <textarea name="message" id="message" rows="5" cols="25" required></textarea>
      </div>

      <button type="submit">Send message</button>
    </form>
  </div>
</template>
Notice the action-attribute on the form itself, you need to paste in the unique URL for your form that you copied in the previous step and paste that in here.
The form doesn’t have to just have a Name, Email and Message field - you can add as many fields as you want of whatever type you want. They just need to have a unique name attribute, so we can store the
data properly in FormBackend.
NuxtJS automatically hooks up your newly created page in their routing, so you can access it by visiting http://localhost:64454/contact.
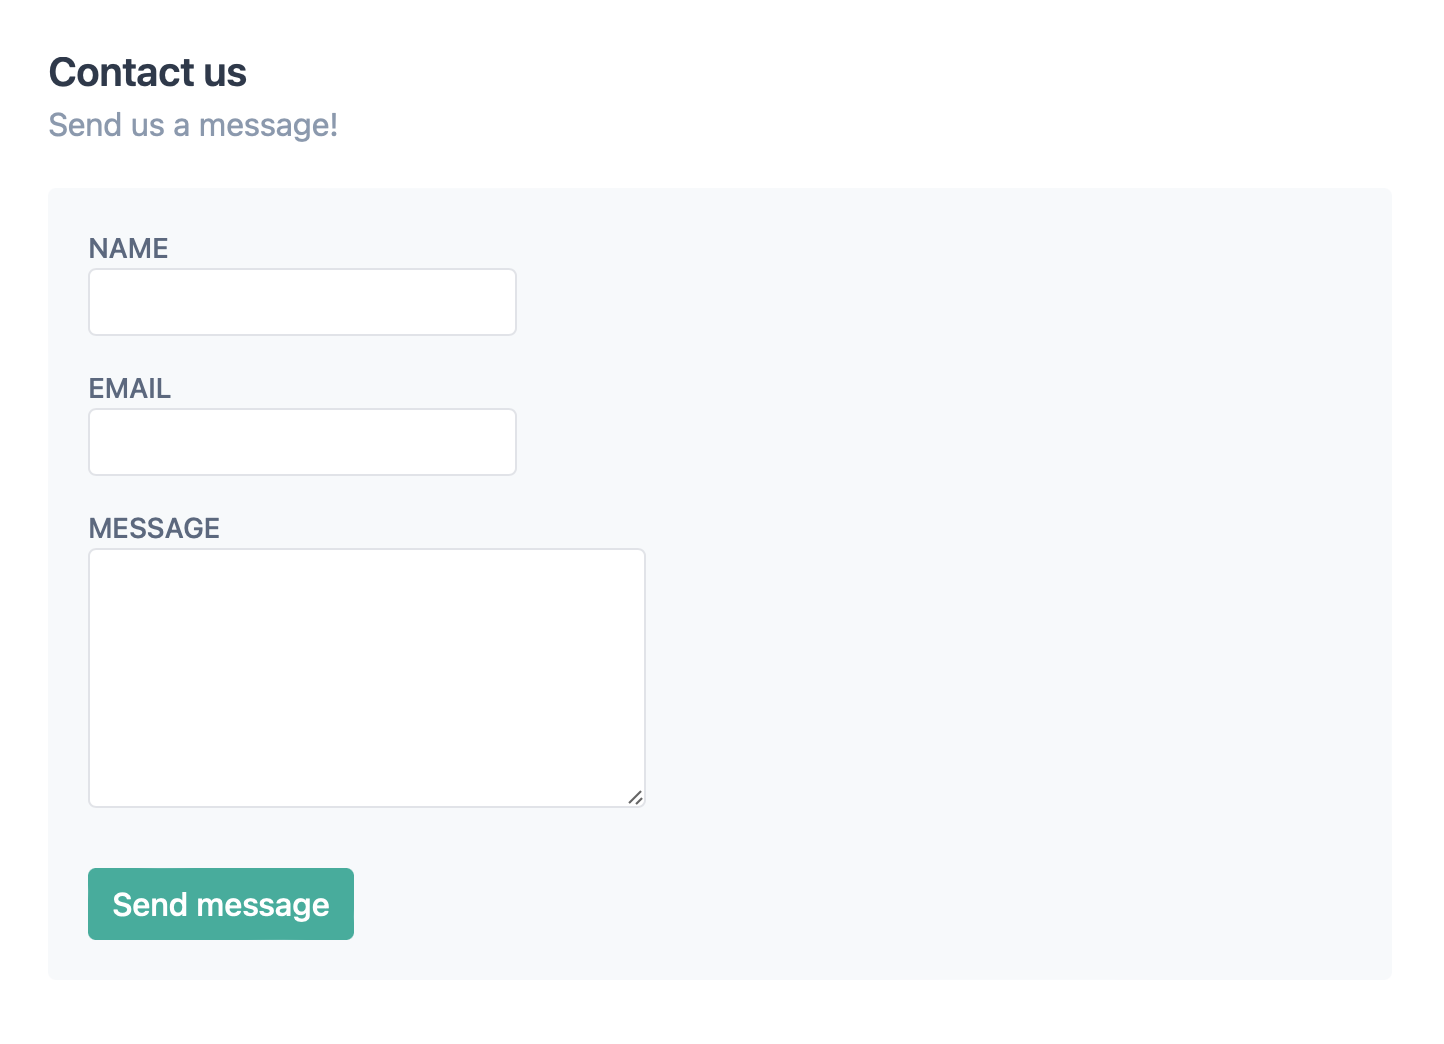
With a little bit of styling we’ll end up with a form that looks like this:
After filling it out and hitting the submit button, you’ll be taken to FormBackend’s submission success page and if you navigate to the Submissions page for the form you created in FormBackend you should see the submission you just added.
We’ve just scratched the surface of what you can do with FormBackend.
If you want to send an email to the submitter when they submit your form, navigate to the Notifications tab and go to the “Send email to the submitter” section. Here you can customize who the email is from, and what the Subject and email body should be. This way you can let the submitter know that you received their submission and will get back to them shortly - or maybe they signed up for a mailing list and you want to send them a link to some beginner content.
You can also send an email to yourself with the data that was submitted with your form. We even allow for attachments and will attach those to the email.
Or you can use webhooks, integrate with Zapier or send the submissions to Google Sheets or Slack using our native integrations.
Every submission is of course checked to see if it’s spam and if it is it’s filtered into the spam inbox.