
User Guides
Customize email templates
How to customize email templates to look like your brand
Emails sent using FormBackend uses a standard email template. We have two standard templates, one for the email that goes to the submitte when they submit the form and one that goes to you, the creator of the form when a new submission is received.
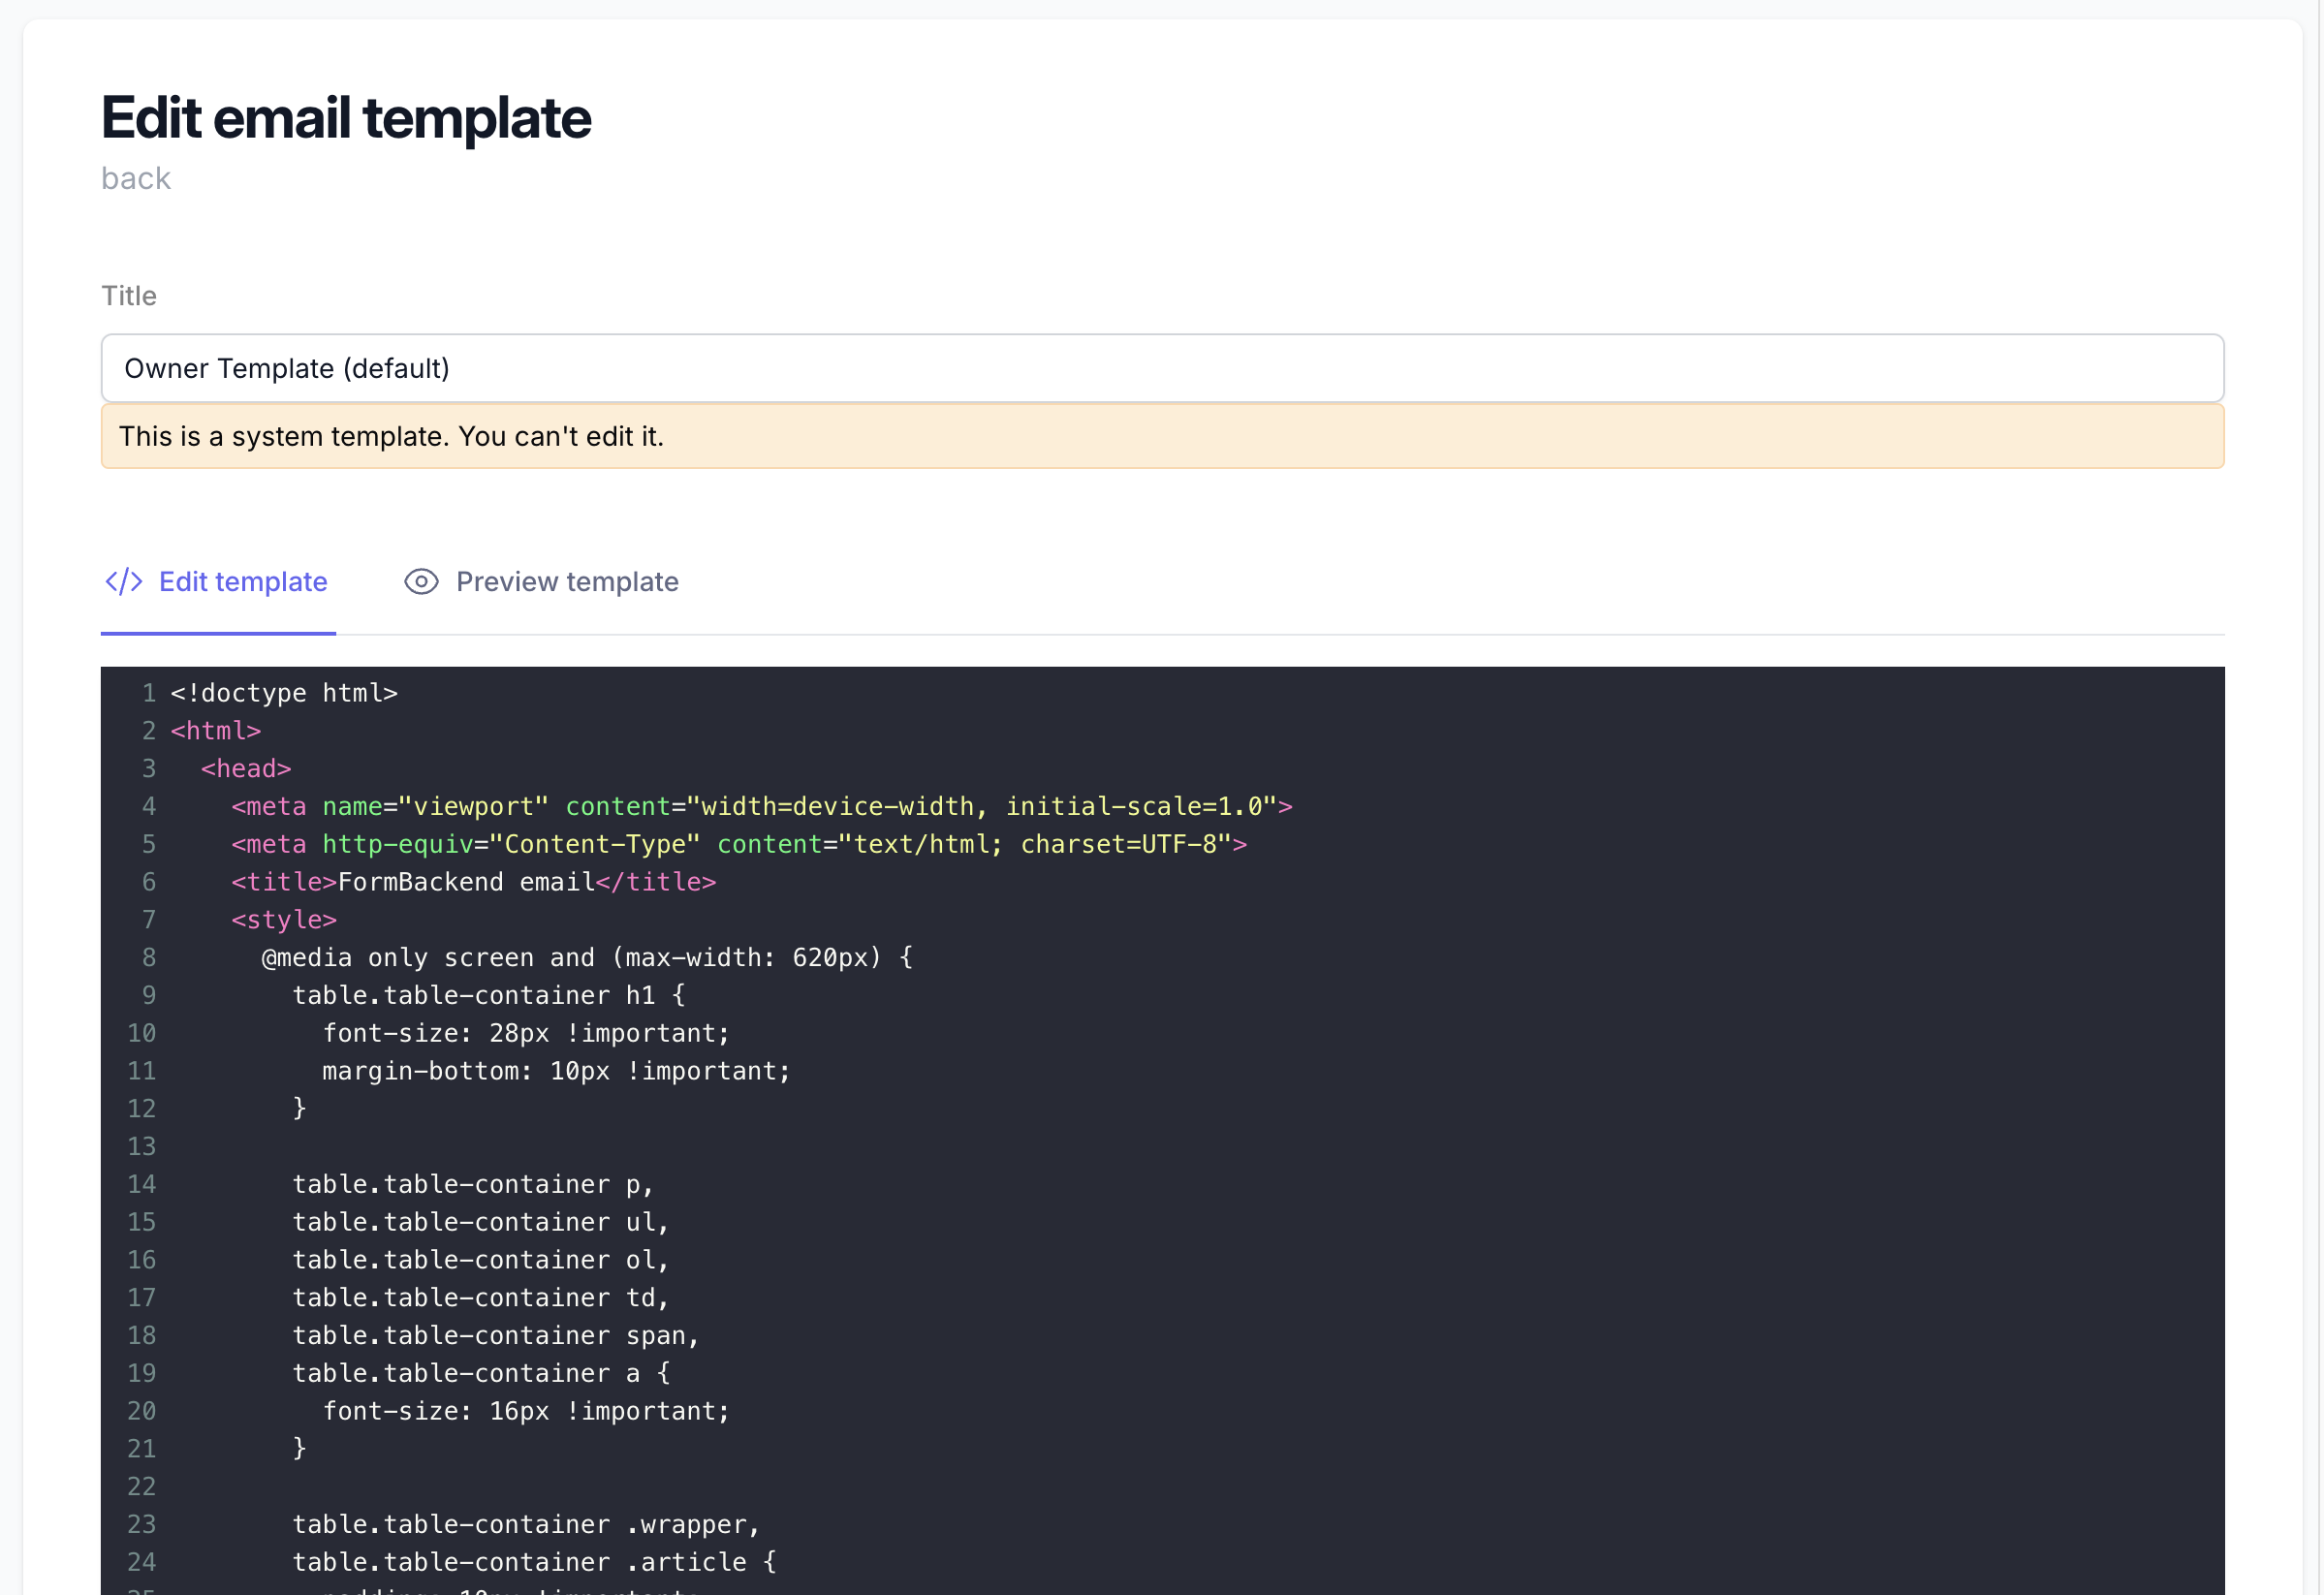
Owner email template
The owner email template, which is what you receive when someone submits your form if you have enabled “Receive email when someone submits your form” on the notifications page for your form - can be edited by visiting the email templates page and opening the Owner Template (default)
You can see there are two tabs “Edit template” and “Preview template”. The “Edit template” tab contains all the content of the email the styles and the HTML. We’re using Liquid templating to add some logic to the template. Around the middle of the template you’ll see:
{% for value in values %}
  <p style="margin-bottom:12px;">
    <strong>{{value.name}}</strong><br>
    {% if value.is_attachment %}
      {% for attachment in value.attachments %}
        <a href="{{attachment.url}}" class="attachment-link">{{attachment.filename}}</a> <span class="attachment-metadata">{{attachment.size}}B</span><br>
      {% endfor %}
    {% else %}
      {{value.value}}
    {% endif %}
  </p>
{% endfor %}
This iterates over all values for a submission, and if it’s an attachment (using value.is_attachment) then we render a link to the attachment, otherwise we render the value ({{value.value}})
- you can read more about what values are available here on the Merge Tags page.
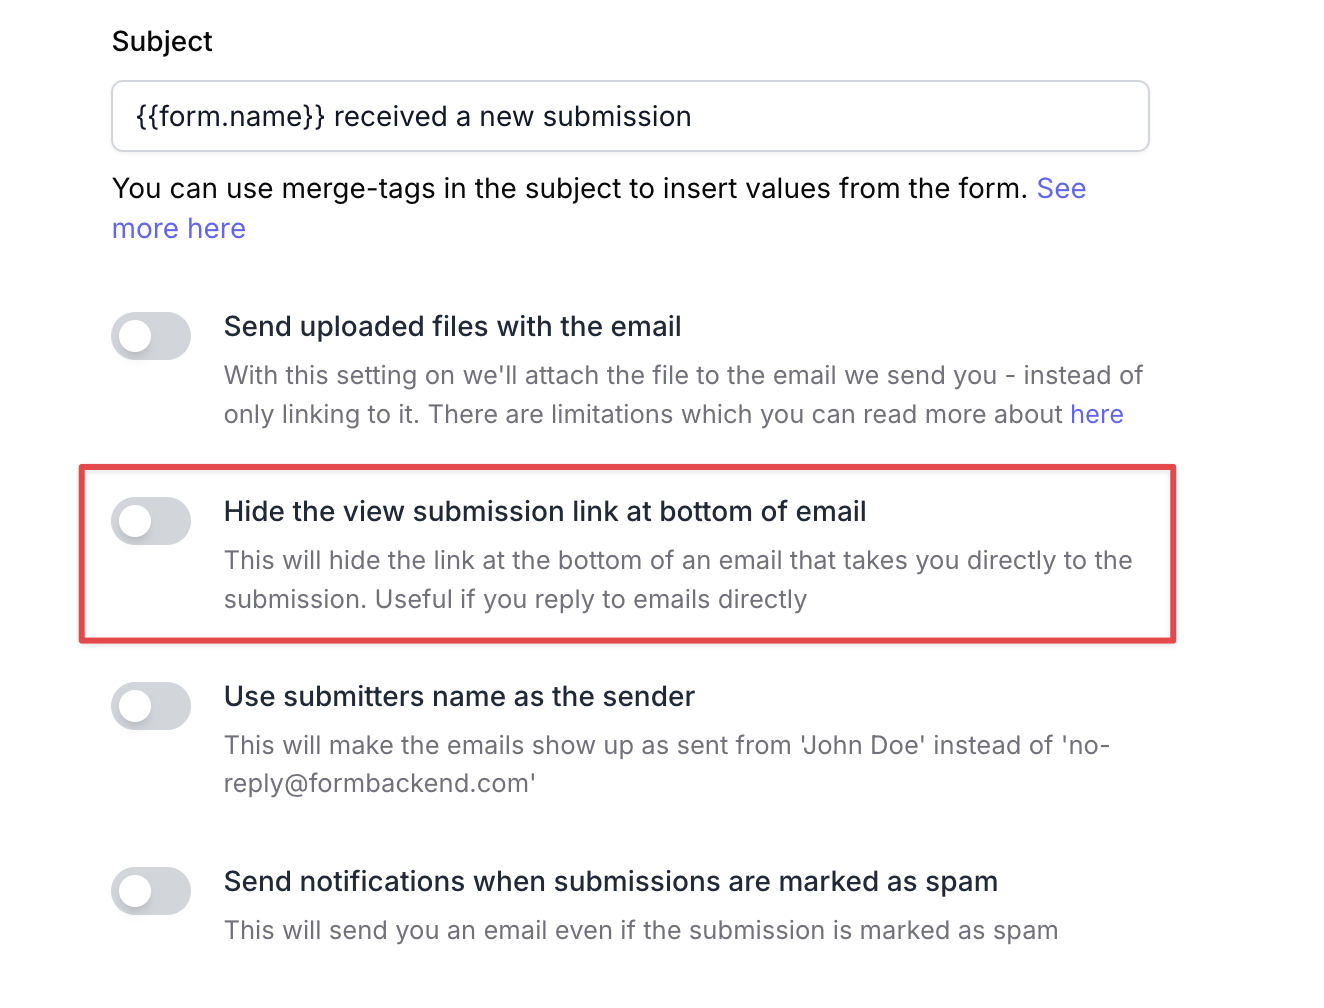
{% if form.show_view_submission_link %}
<p>
<a href="{{submission.url}}" class="link">View submission →</a>
</p>
{% endif %}
Will show you a link to the submission in FormBackend if the “Hide the view submission link at the bottom of email” option is unchecked under notification settings for the “Receive email when someone submits your form”.
Preview emails
You can preview what an outgoing email will look like by going to the “Preview template” tab
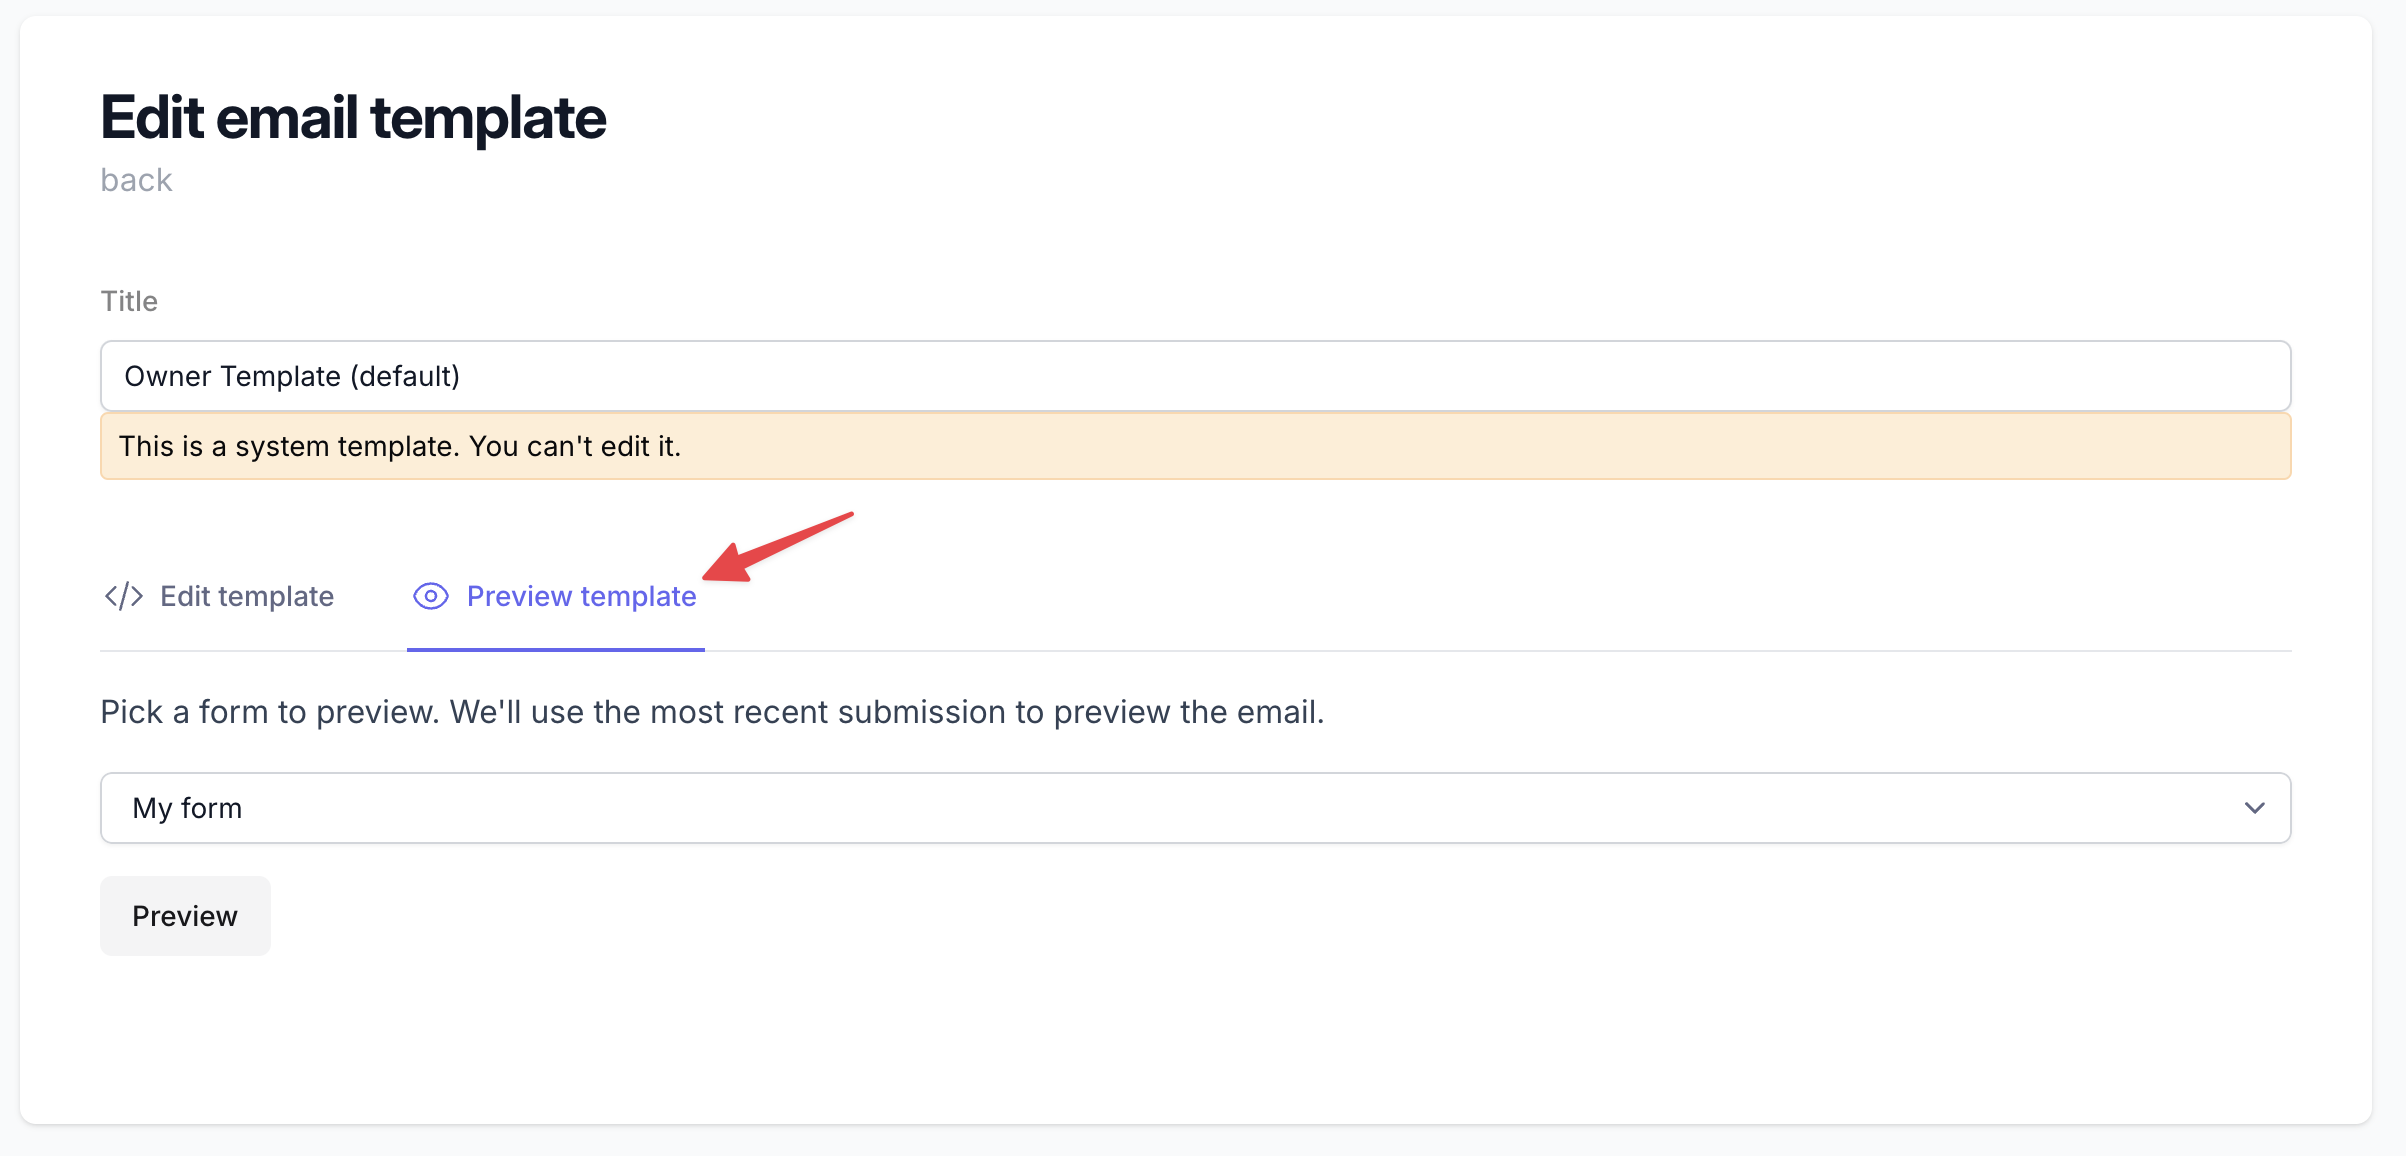
Here you can select one of your forms - make note that the form must have at least one submission as we’ll take the latest submission for the form and use that when previewing.
It’ll look something like this once you have clicked the “Preview” button:

Creating a new template
You can’t edit the default system templates, but you can create a new one or clone an exsting and make your own changes if you’re on the right plan that has custom email templates.
Let’s go ahead and clone the “Owner Template” by clicking on it and clicking “Duplicate” down at the bottom. Let’s give it a new name (I’m calling mine for “My template”) and make some changes.
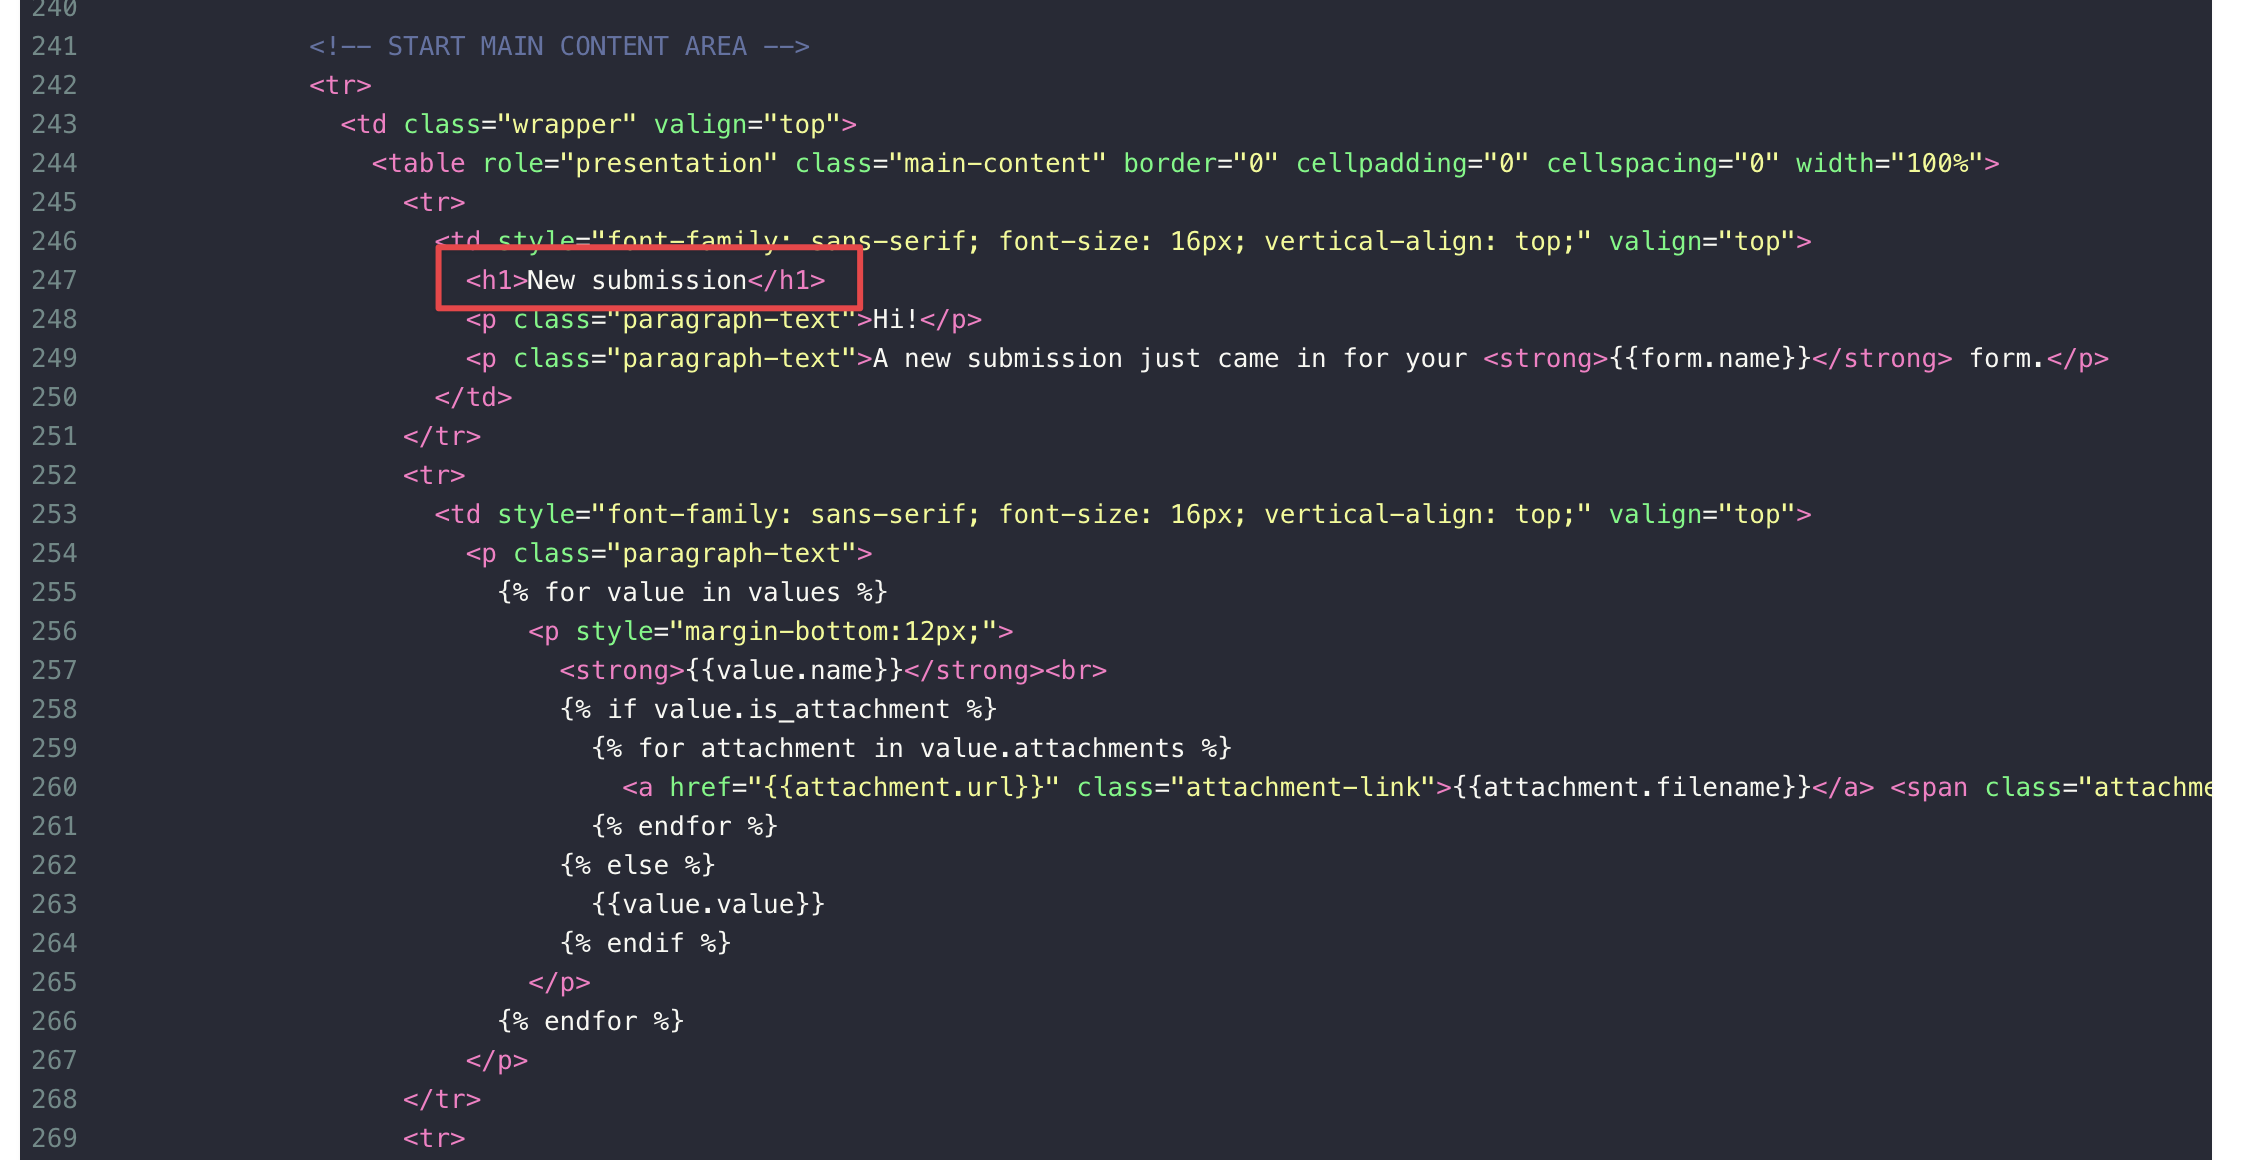
I’ll go ahead and add a “New submission” header above the content:
I’ll also go ahead and remove the “Powered by FormBackend” footer, by removing the following HTML
 <!-- START FOOTER -->
<div class="footer">
  <table role="presentation" border="0" cellpadding="0" cellspacing="0" class="table-footer" width="100%">
    <tr>
      <td class="powered-by" valign="top" align="center">
        {{powered_by}}
      </td>
    </tr>
  </table>
</div>
<!-- END FOOTER -->
You don’t have to hit save before previewing the changes, so go to the preview tab and pick your form with at least one submission and click “Preview” - you should see a preview that looks like this:
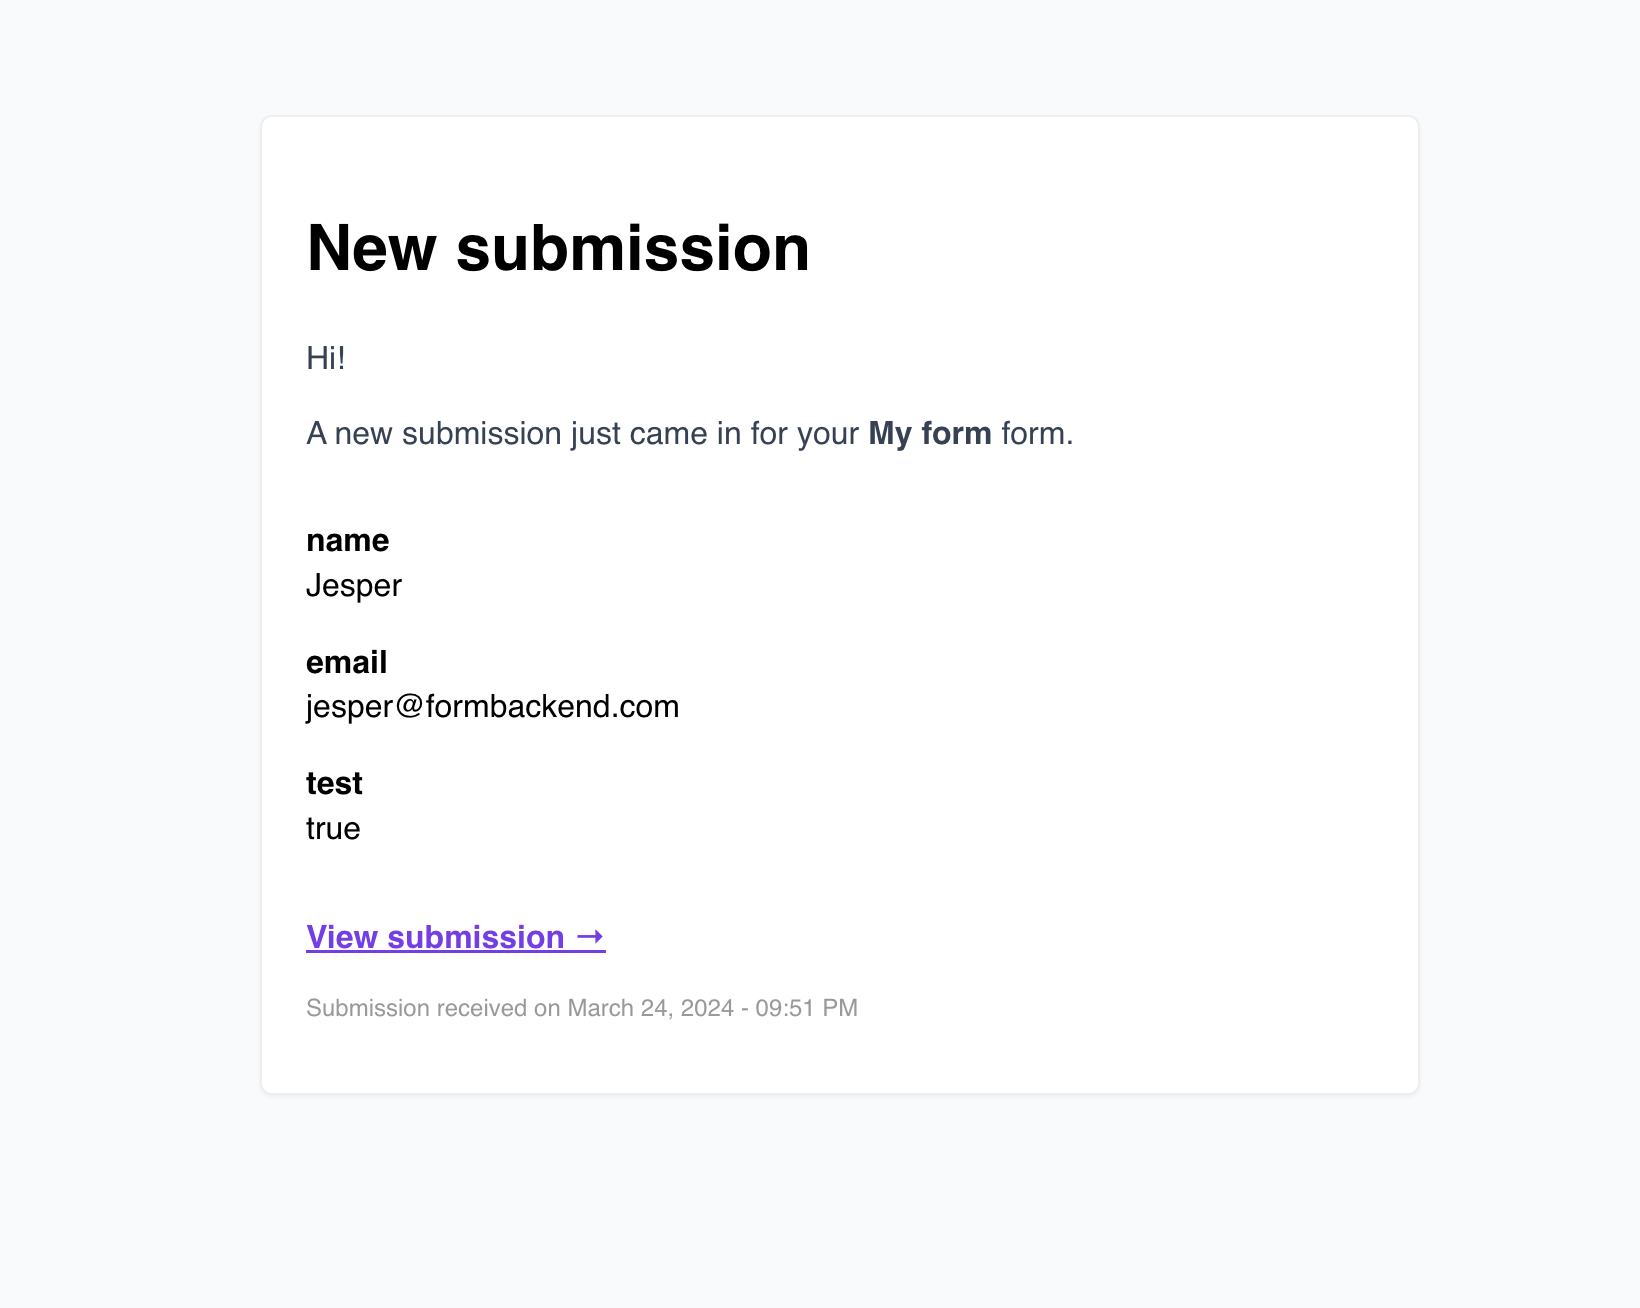
As you can see it contains our new heading and the “Powered by FormBackend” at the bottom is gone. Let’s hit save and use it for a form.
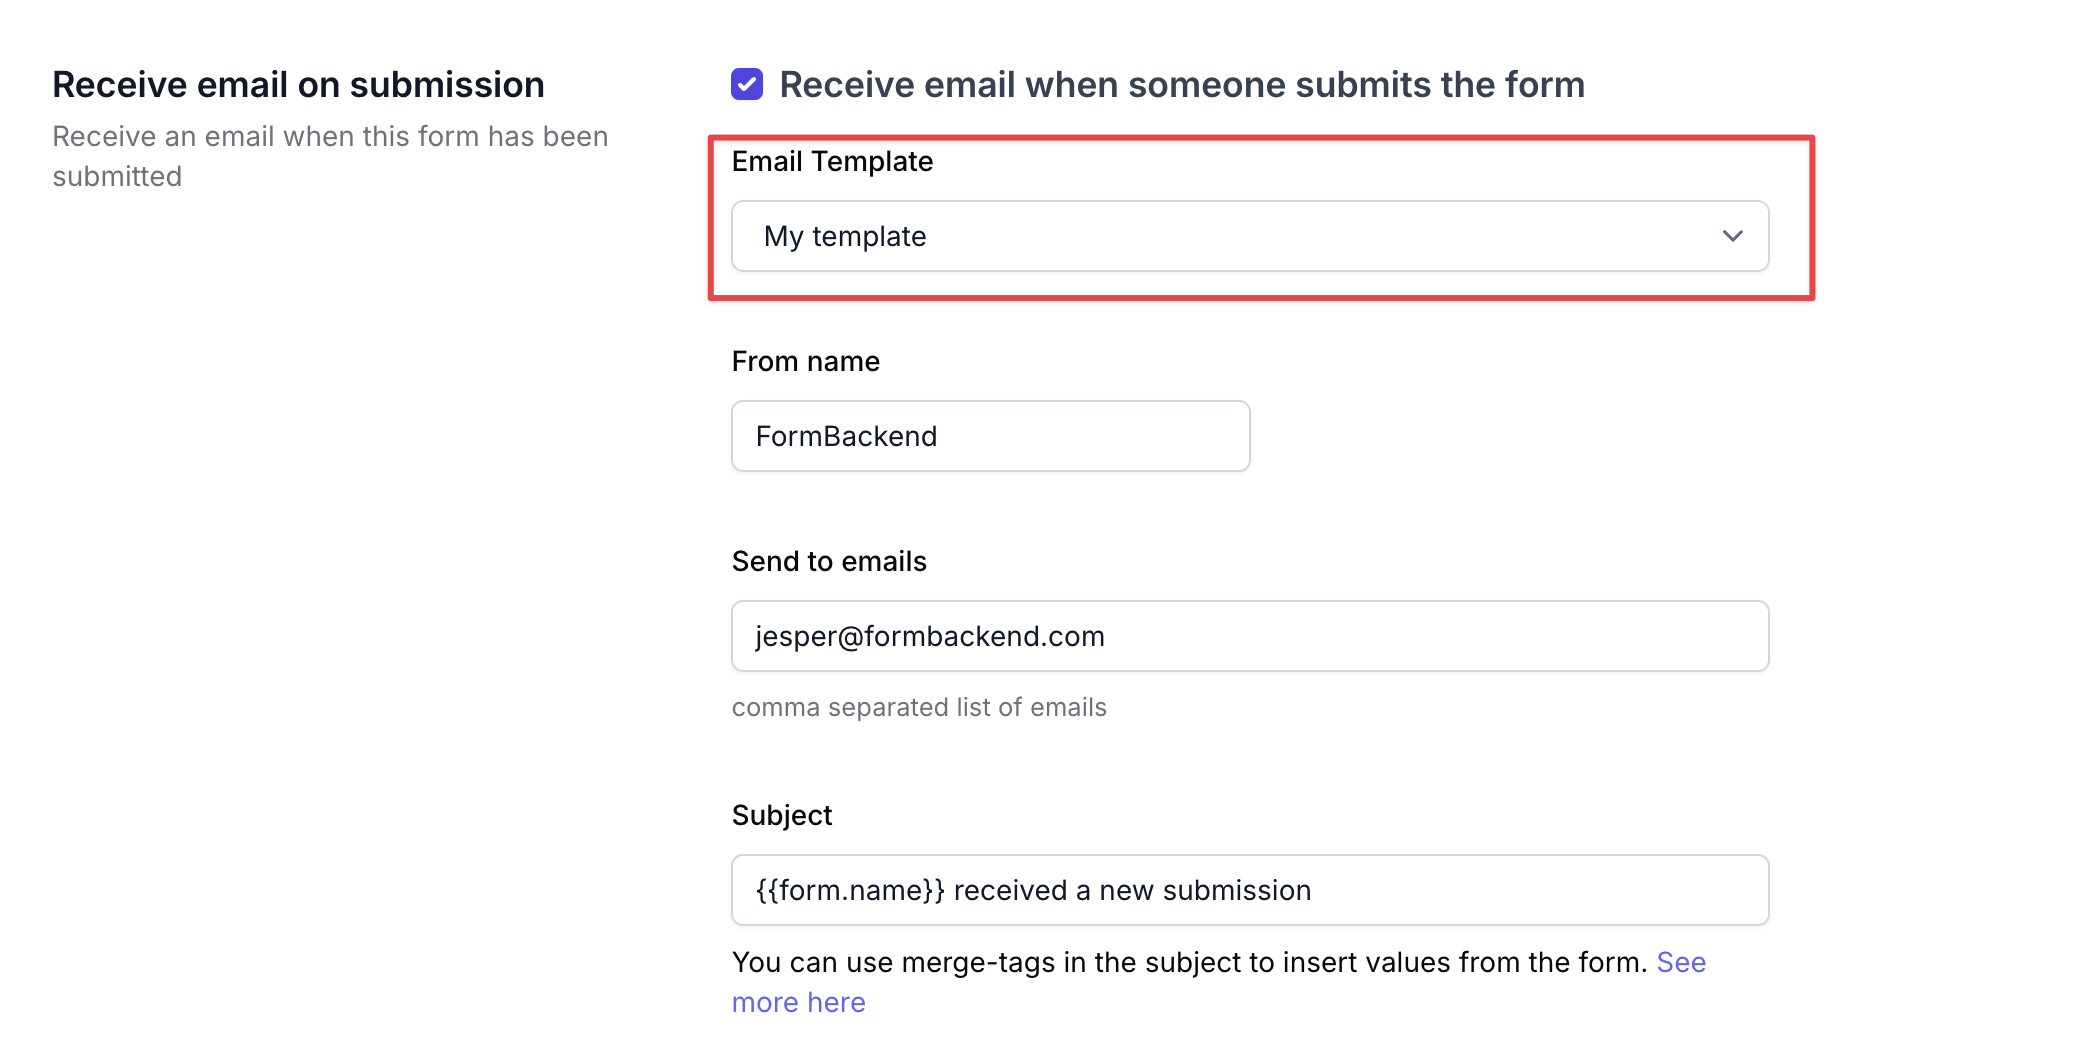
Select the new email template for your form
Navigate to your form of choice and go to the “Notifications”-tab. Make sure the checkbox for “Receive email when someone submits the form” is checked, and select your newly created template in the “Email Template”-dropdown. Once that has been selected, press “Save” at the bottom of the page.
Emails sent from your form will now use this email template.
Submitter email template
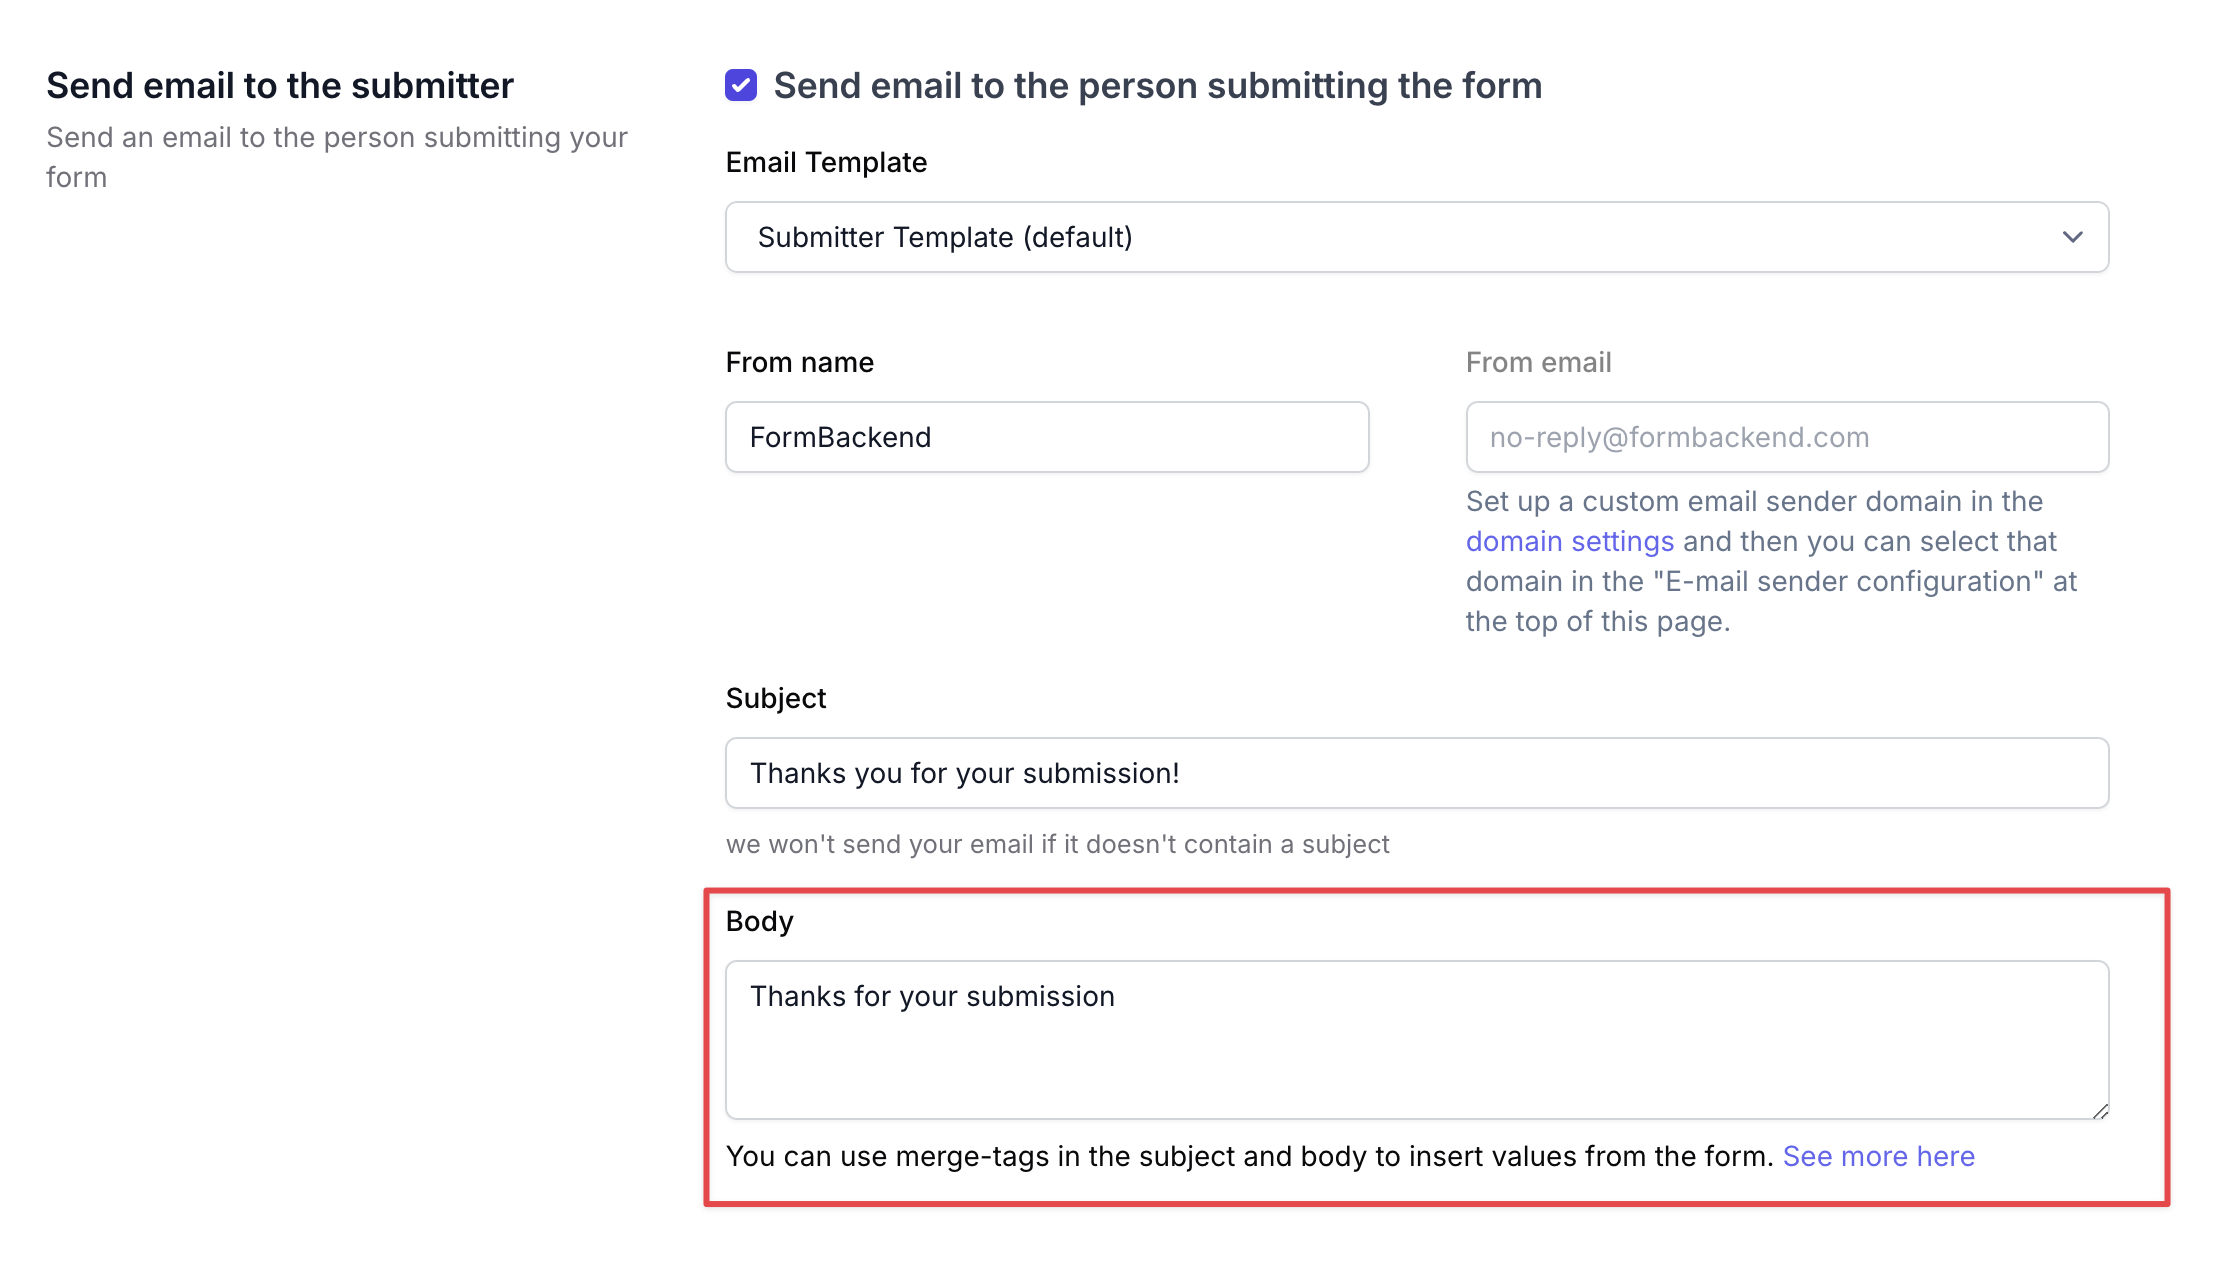
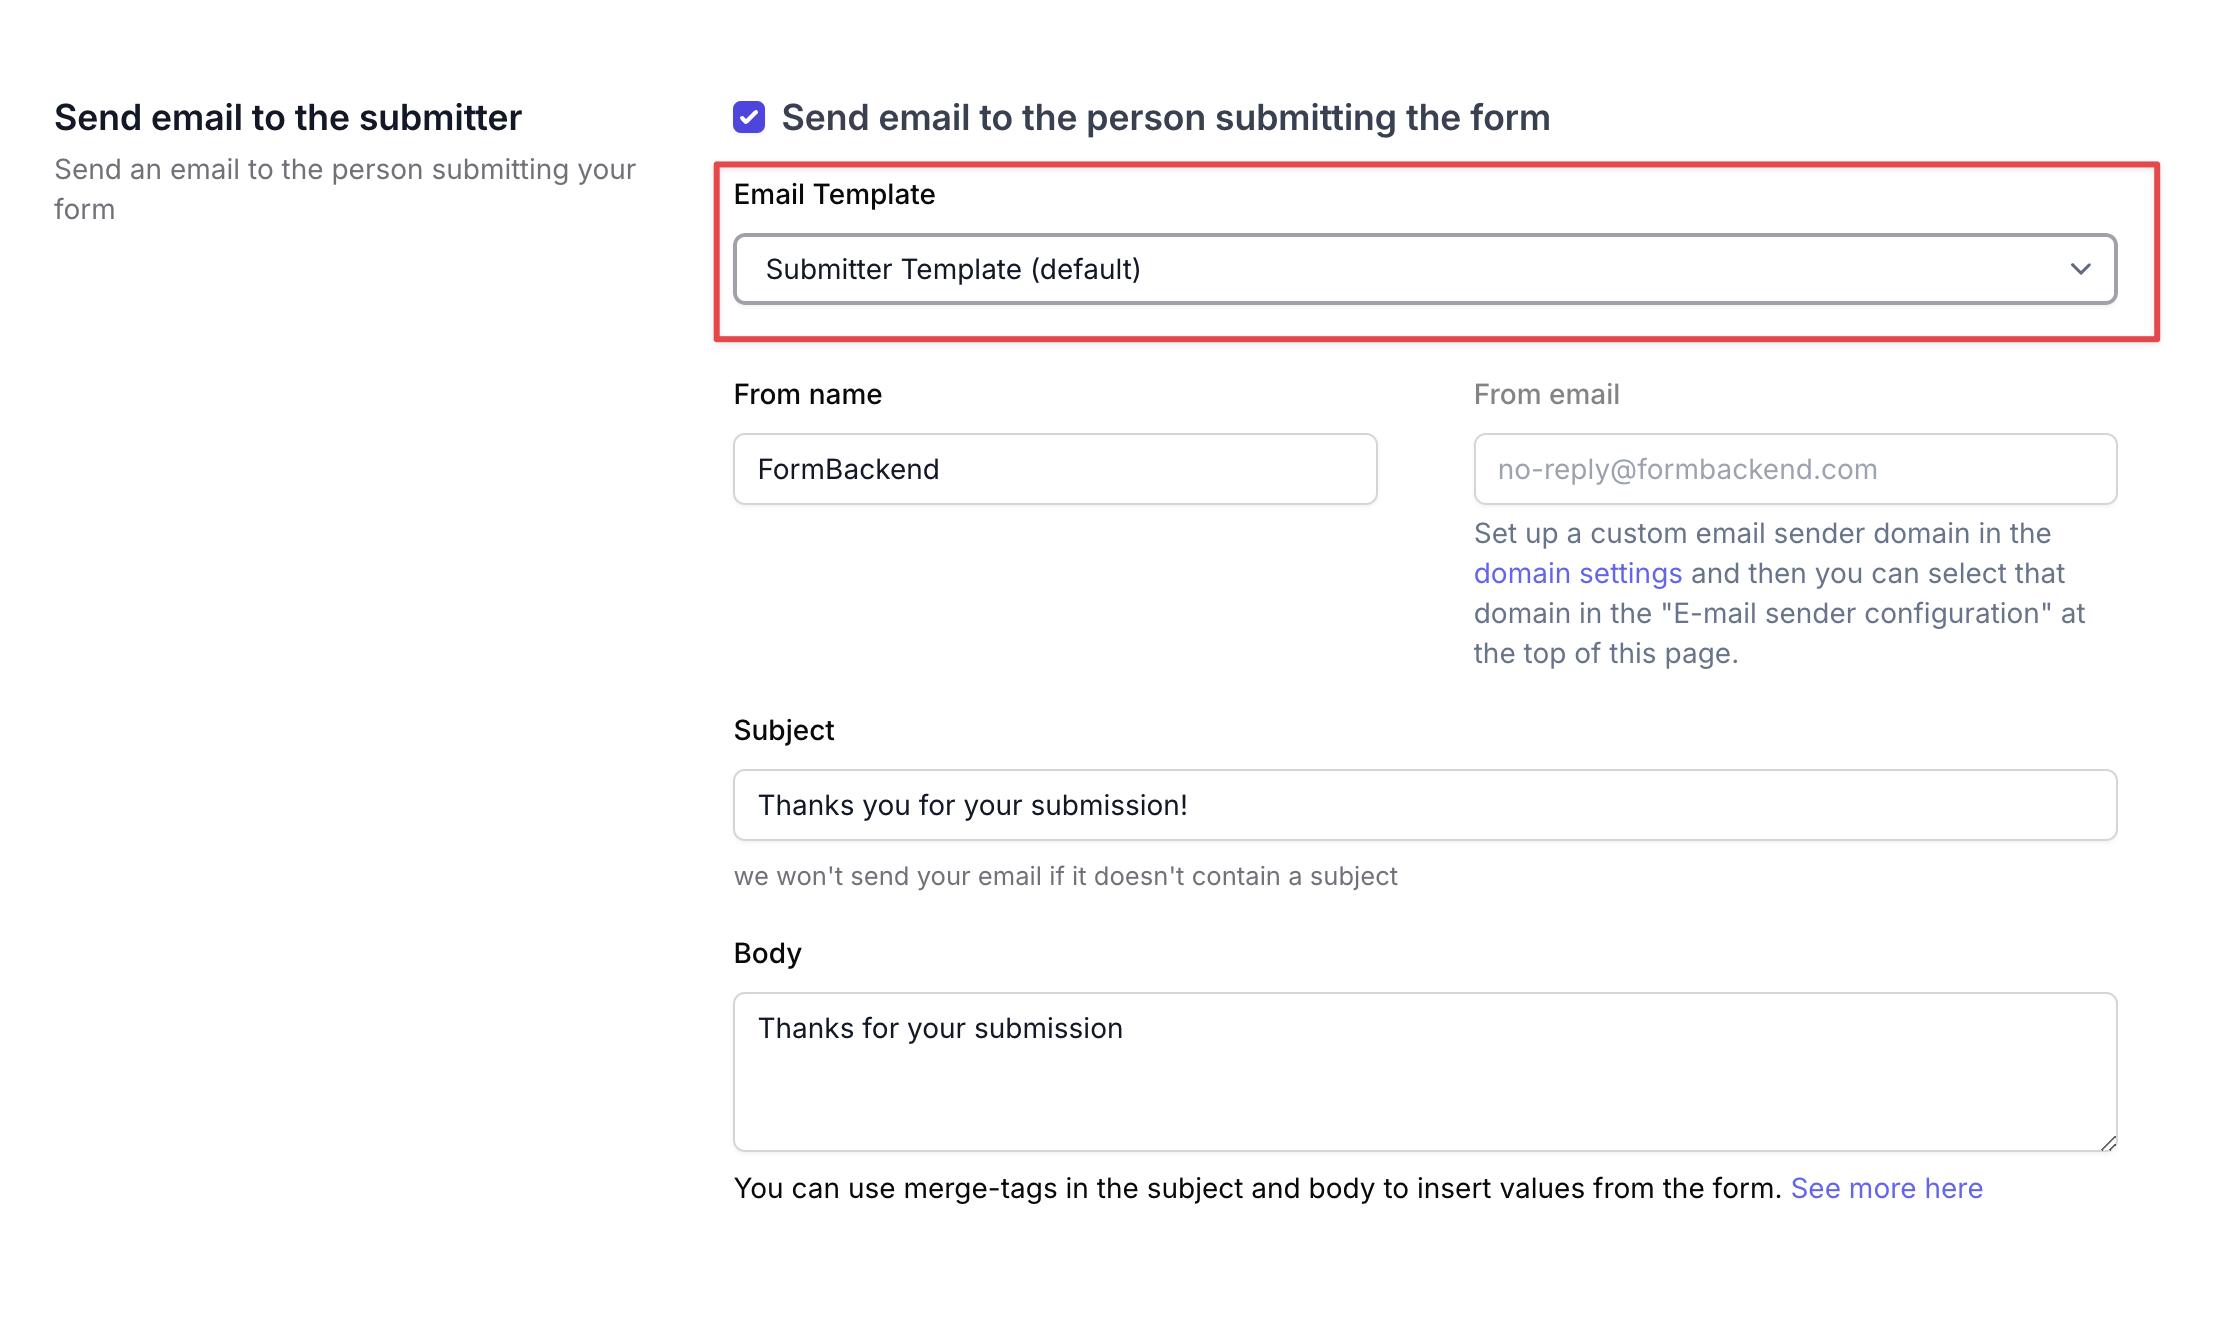
The submitter email template is the one we use when you have checked “Send email to the person submitting the form” for a given form of yours.
It has {{template.body}} somewhere in the middle of the HTML content, which is the value of the “Body”-field for the submitter email
You could just replace {{template.body}} with text, but keeping it will make it re-usable between different forms that might require a different body.
The workflow for editing the submitter template is the same as described for the owner template above, you just have to remember to select the template for the submitter email under Notification settings:
Conclusion
This is how you customize email templates when using FormBackend. You can use the look and feel of your brand and remove FormBackend’s branding.