
Features
Custom sender domains
Use your own domain to send emails
A big part of FormBackend is sending emails when someone submits your form. In order to send emails using your own domain and not FormBackend’s, you need to add a Custom sender domain. This is so we can correctly configure DKIM on your domain which helps with deliverability.
Getting started
In the right side nav, click on “Sender Domains”. Click on the “Add new” button and enter your domain name (domain.com without the http(s)://).
Next we need you to go to your DNS provider, this is often times where you bought your domain name. We need you to add two new DNS records
a TXT and a CNAME record. These records need to have the values listed on the page you just got redirected to.
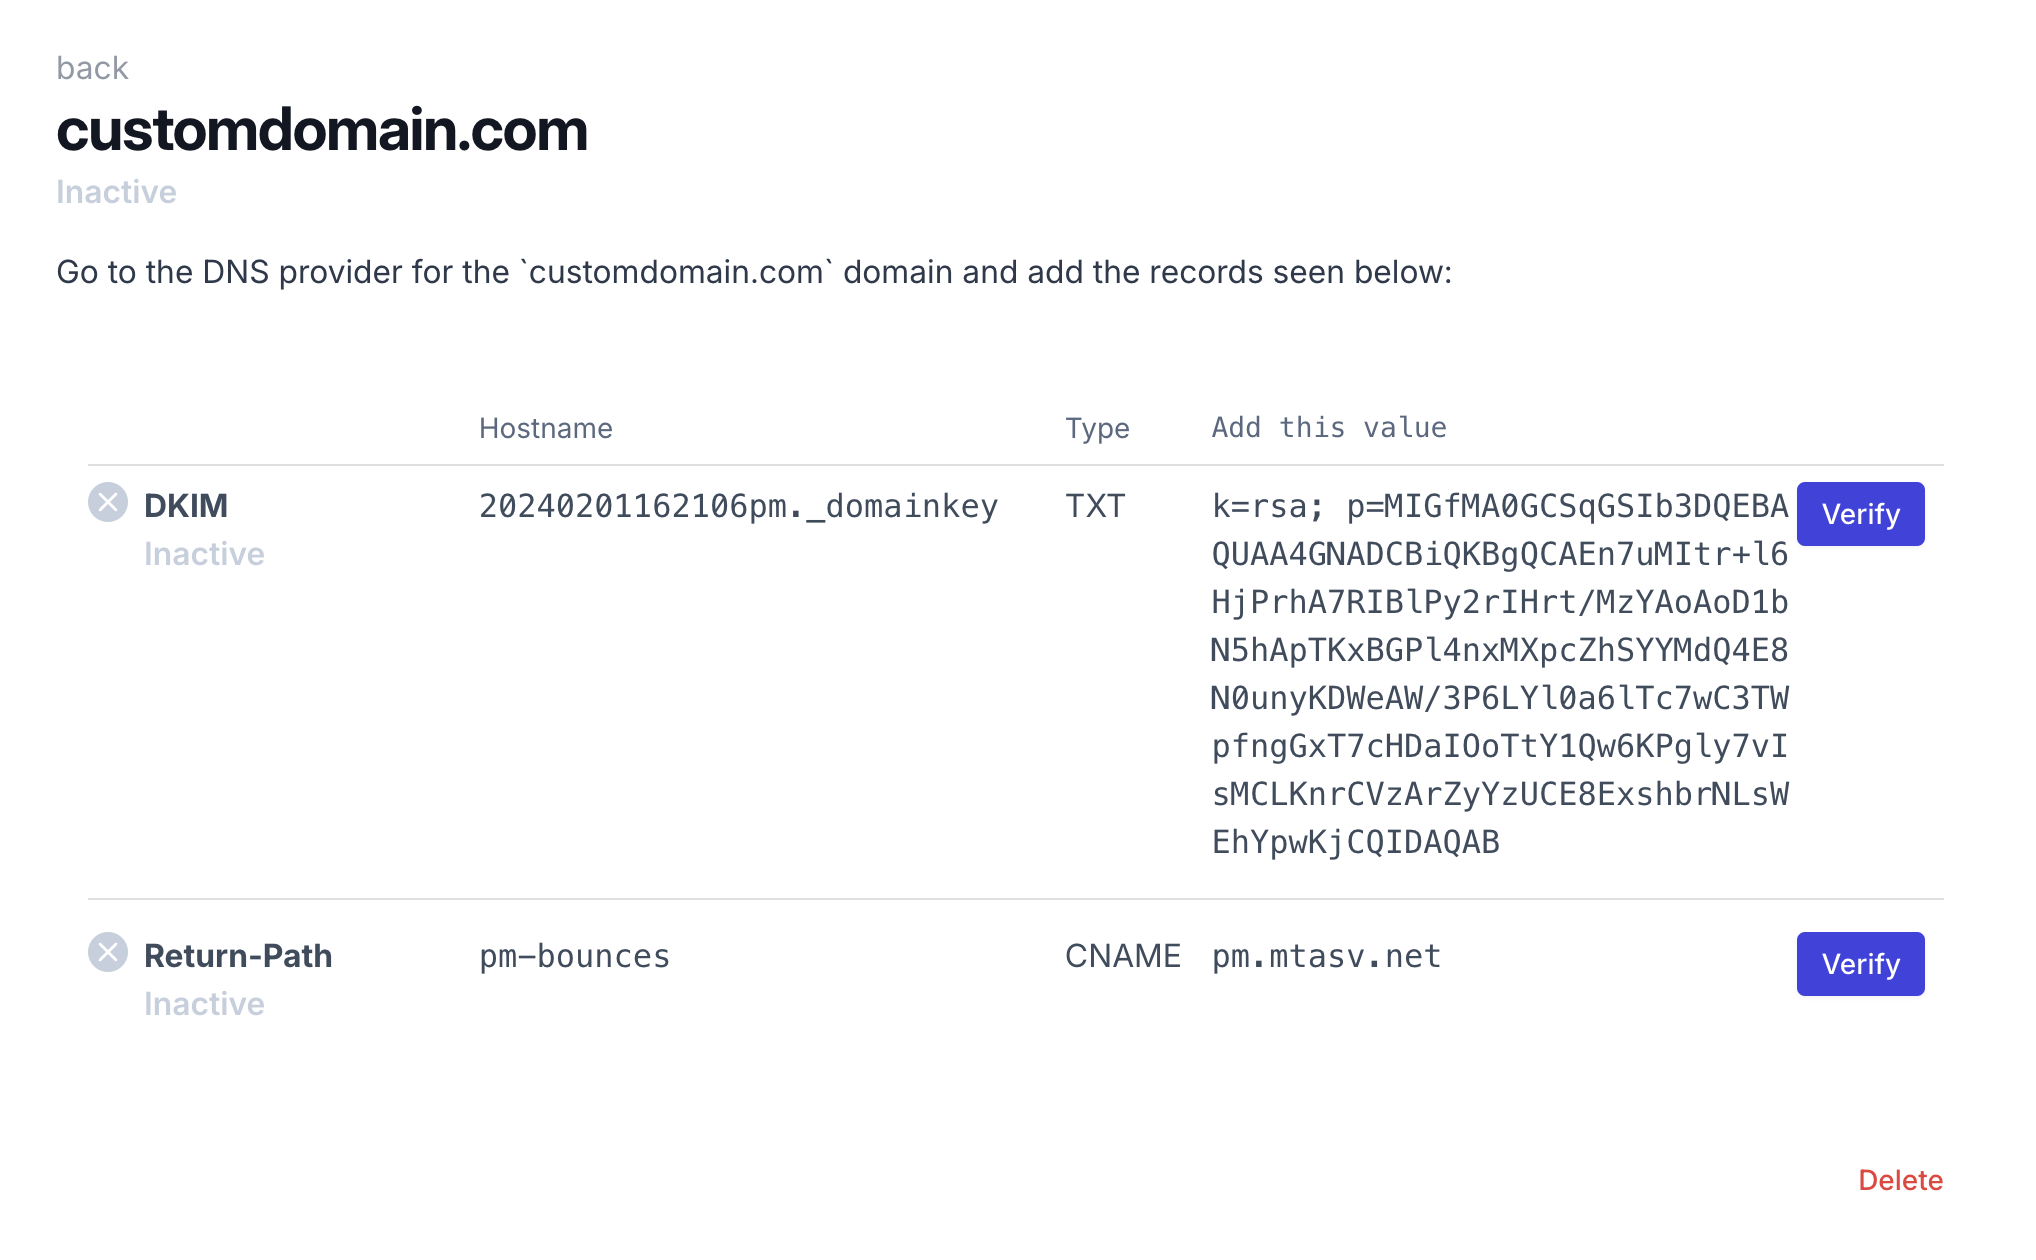
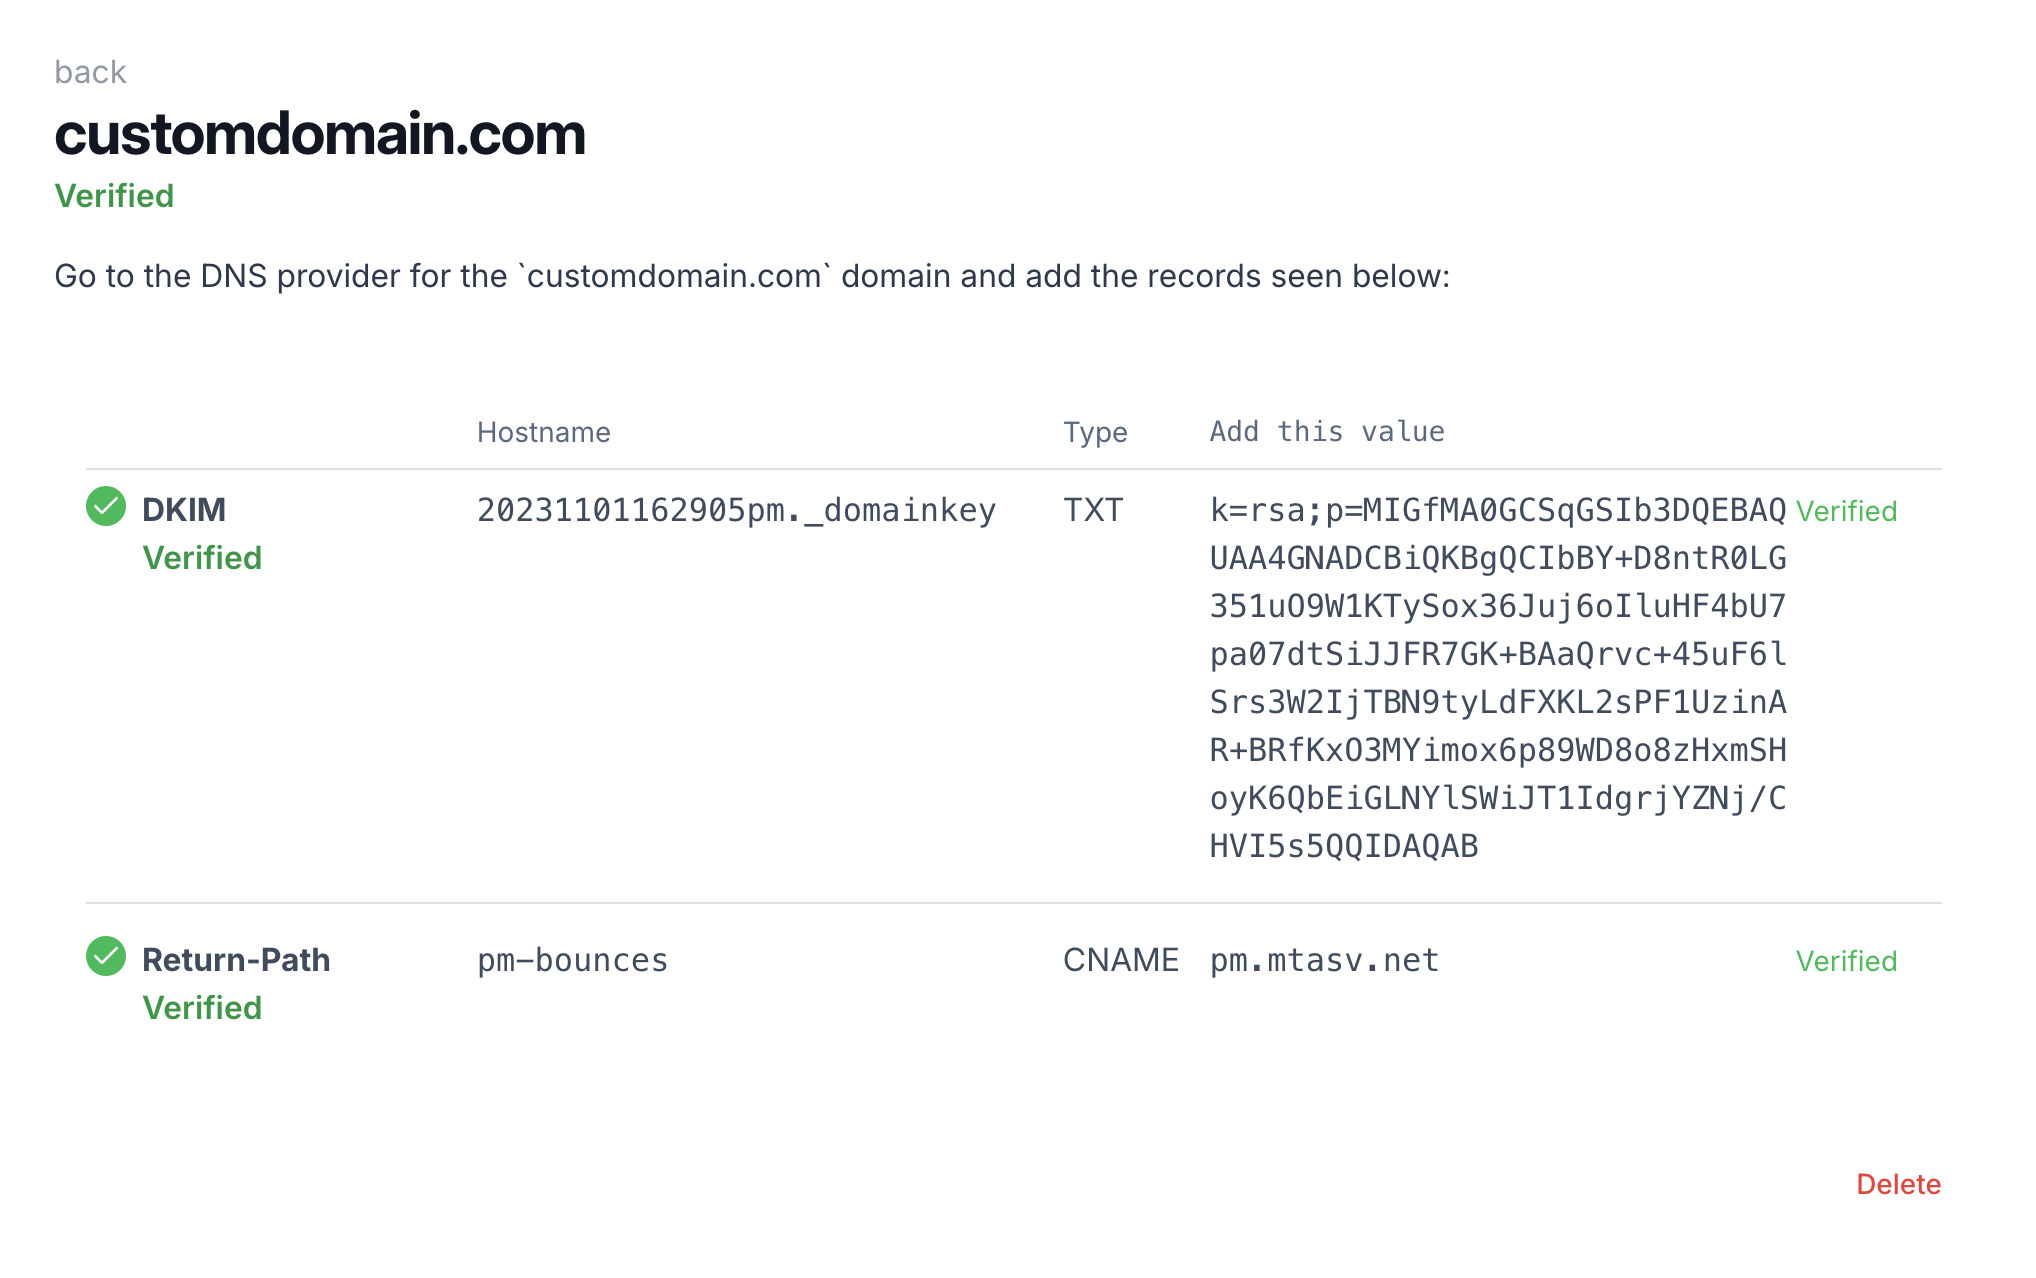
Once they have been added, you can click on the verify buttons to make sure everything is set up correctly. It can take a little while before the configuration with your DNS provider is propegated, sometimes hours.
Use the sender domain in my form
Once they have been verified, you can use the domain on your forms. Navigate to the form in question and go to “Notifications”. At the top you’ll see a “E-mail sender configuration”, in the dropdown to the right pick your newly configured sender domain. If you leave the text-field before the “@” blank, we’ll send from “no-reply@yourdomain.com” - but you can type any plaintext you want in this field.

That’s it!